Monday, October 24, 2011

Chapter Eight: The hillside and willow tree

 EDITORS NOTE:  I am not Derfel Cardarn.  I am a member of the Derfel Cardarn Appreciation Society.  The following was article is from a Lego online discussion forum www.eurobricks.com. All photos and content belong to the great "Derel Cardarn"

The following was posted by "Derfel Cardarn" on Eurobricks.com discussion forum.  

 Defrel Cardarn's latest update to his Guide to building a Medieval village.

Time to complete the stream and hill, then we can start laying down the land for the main village.

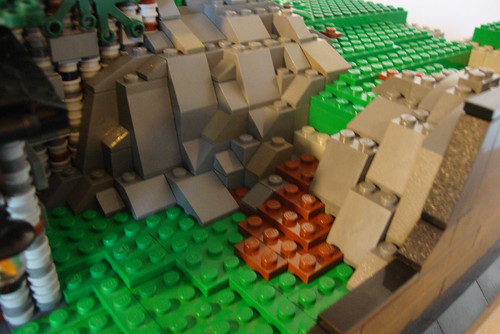
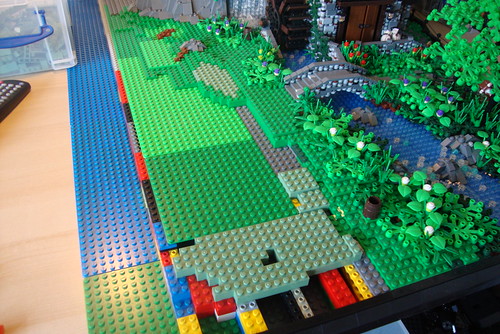
To start, we need to lay down the final part of the stream. This is done the same way as before, using rocks and clear plates on top of the blue plates to make some more small water falls. You will also need to start laying some plates and rocks at the side of the river.
Posted Image

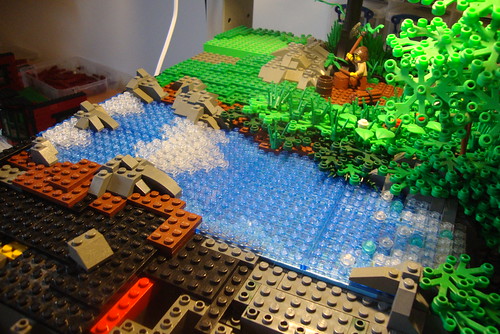
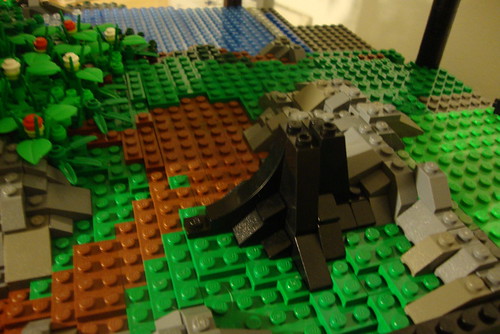
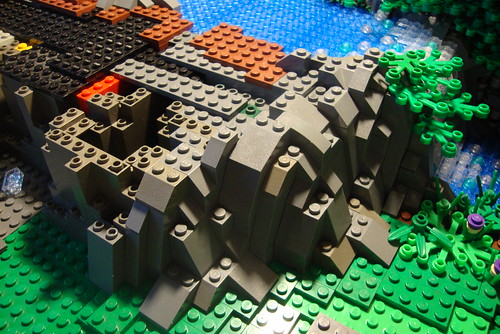
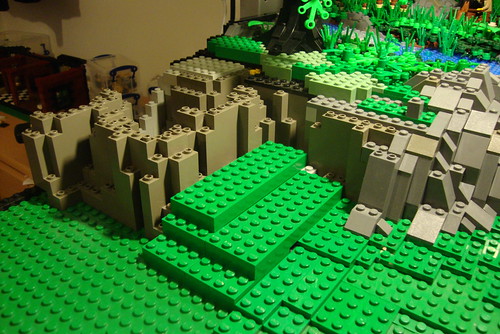
Then we need to build up some more of the rocky cliff. As you can see, I use the BURP pieces as a frame to build the sloping rocks over.
Posted Image

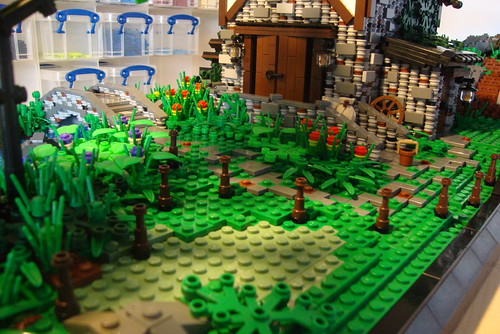
Next I have started to add the green plates. This is done by simply laying plates at different random heights, but to keep things from looking to blocky, I try to make sure that the plates are always only 1 plate higher or lower than each other. Note that I have also added some patches of sand green for variety. I have used sand green bricks for this as they are easier to get hold of. These are used the same way as plates, but remember to lay them at a lower level then you lay the plates so they end up being the same height.
Posted Image

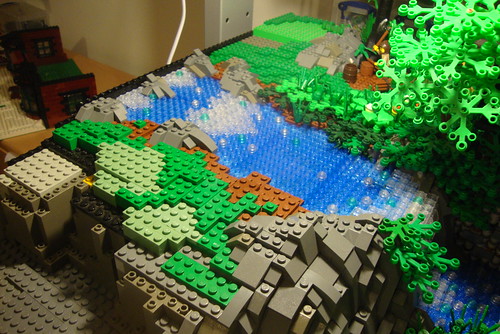
Then we add some foliage the same way as before.
Posted Image

Next we need to finish off the corner. This is again done by laying plates and adding some rock formations. The rocks are very important, because we have built a rocky cliff, we also have to build various over small rock formations here and there, to show that the whole area is rocky. Otherwise it would look a bit odd if there was just a random rocky cliff with no other rocks in the area. Note how I have also continued to build up the black base to give a nice simple border round the moc.
Posted Image

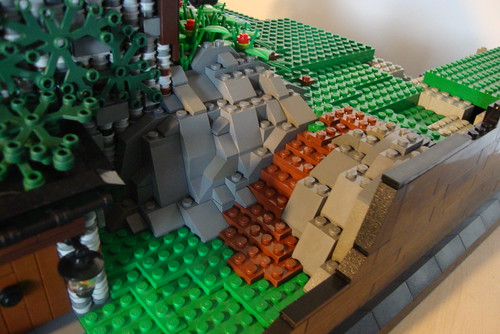
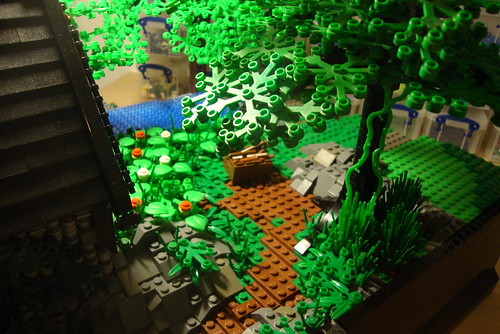
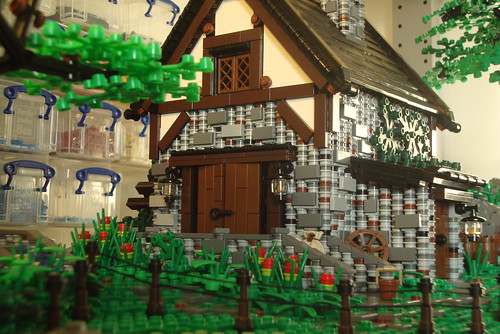
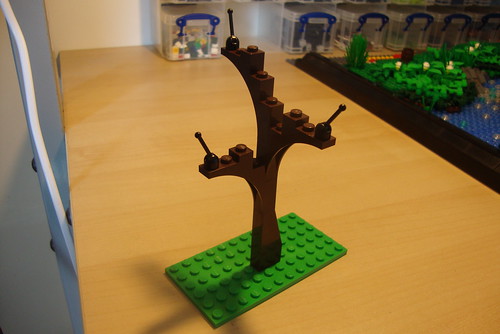
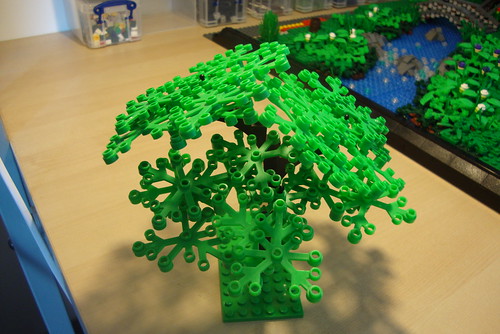
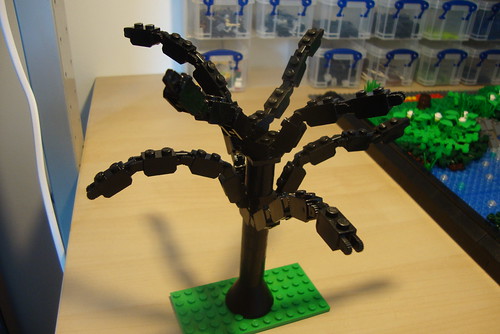
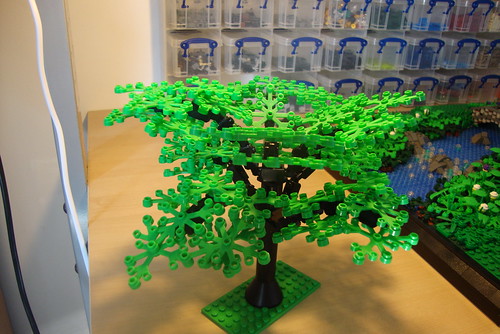
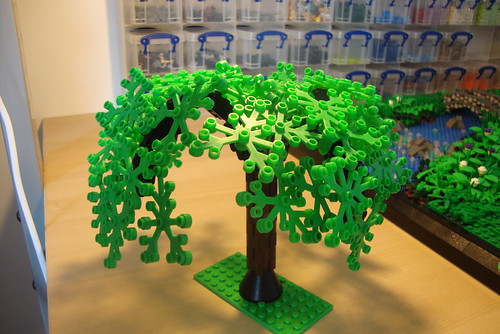
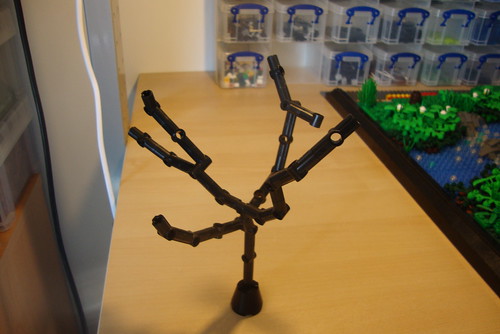
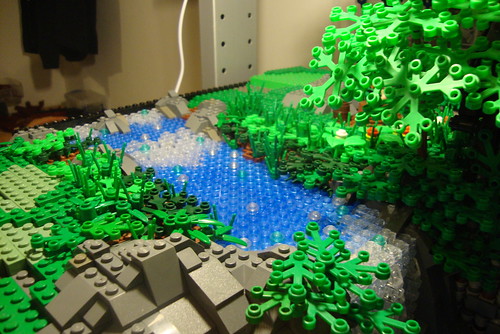
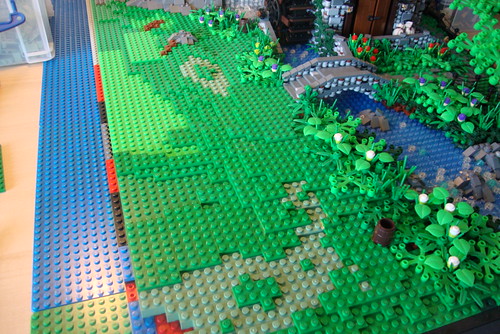
Then, on the other side of the stream, we can build a weeping willow type tree which will look good overhanging the stream and also enclose this back area a bit more, to give it a more natural over grown look. The willow is built using the same tree method that I showed earlier with the hinge bricks. Its just a case of folding the hinge bricks in a downward arch and attaching lots of tree pieces to them to give the weeping willow effect.
Posted Image

Posted Image

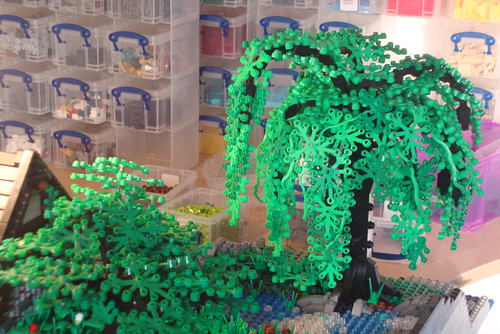
Then i've just added a couple of witches sacrificing a frog in the corner :classic:
Posted Image

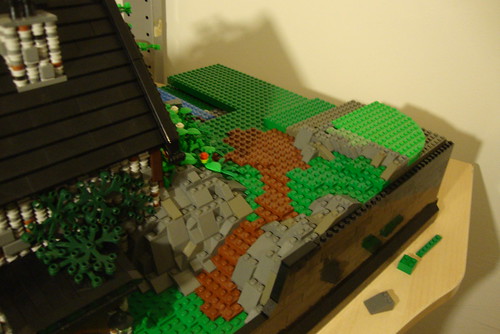
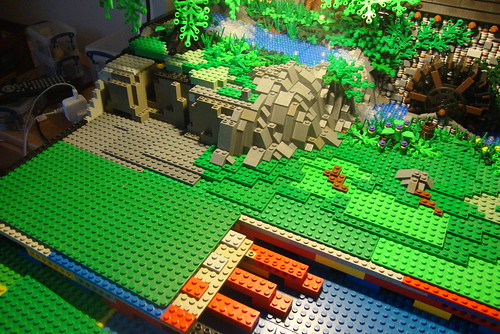
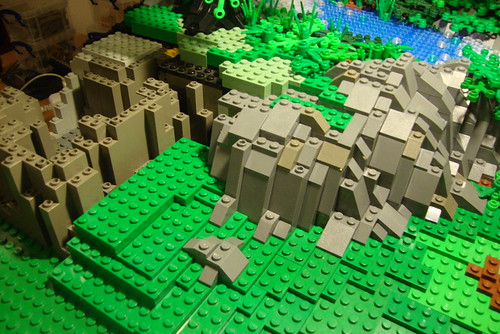
Now we need to finally finish the hill, so first we need to give ourselves some more land to build on. This is done the same as before, by laying out supports and then placing a green base plate on top.
Posted Image

Posted Image

Again, on top of the green base plate I lay a few plates and sand green bricks here and there. The main thing you have to remember is to cover the edges of the base plate with green plates so you don't see the distinct line of the edge of the base plate.
Posted Image

Then we continue this process down to the other end of the moc.
Posted Image
Note how I have added in different patches of green in other shades. This breaks up the standard green.
Posted Image

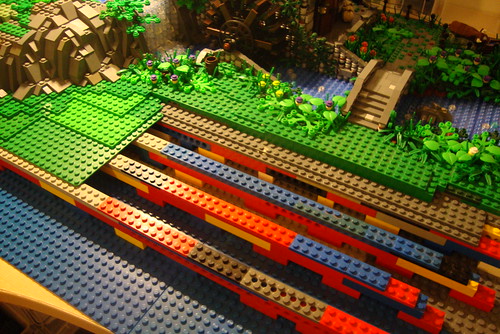
Now we need to start coming down again with another row of base plates, but for now, I will just lay enough so I have space to finish the hill.
Posted Image

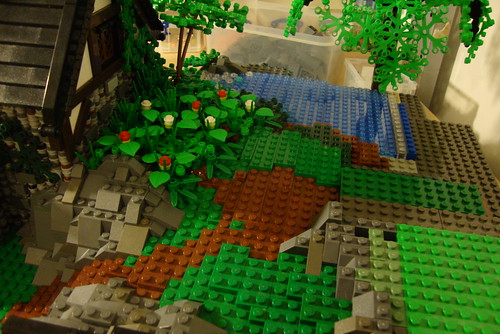
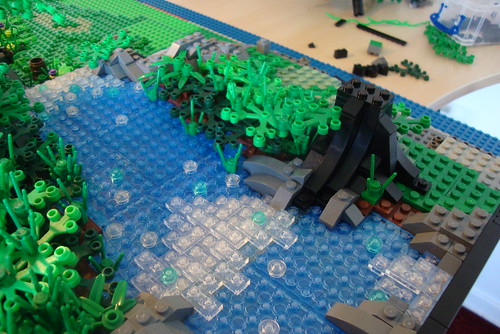
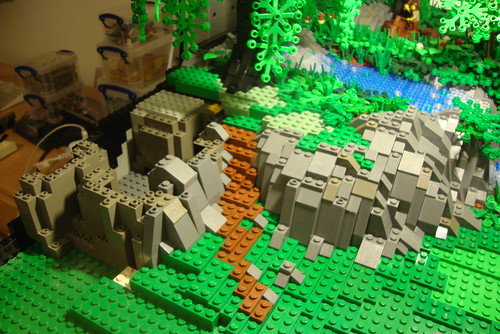
Next, we lay out some BURPS as a guide and frame to build the cliff up on. Note that I have left a gap to build up some grass and a path.
Posted Image

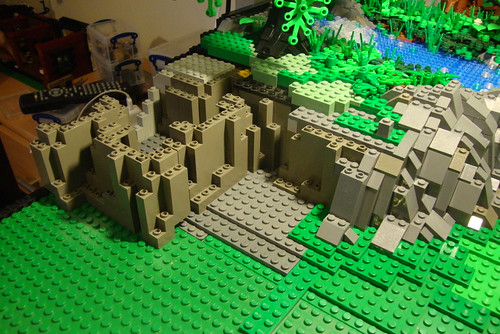
Next I have placed some large green bricks to start forming a basic frame of a slope of grass.
Posted Image

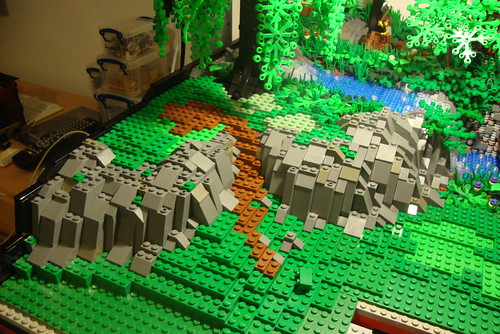
Now I have started to add some plates and build more of the rock work. There are many ways of building rocks, I have chosen to use slope pieces as these are very common, easy to work with and come in most Lego sets.
Posted Image

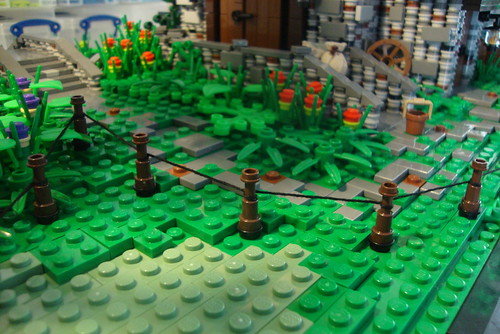
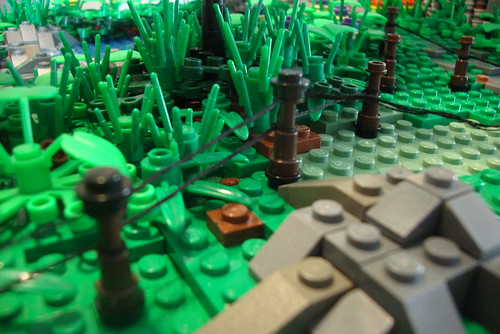
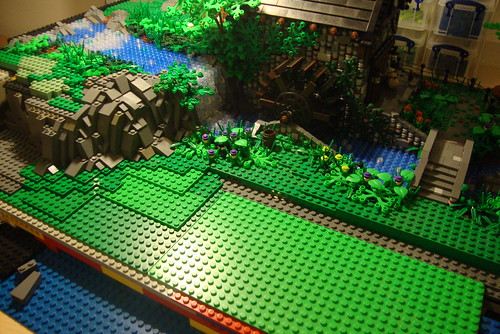
I have now started to add some brown plates to form a path. Once these are in place we can build the rocks up around them on either side.
Posted Image

Now we can carry on building the rocks to finish of the cliff.
Posted Image

Posted Image

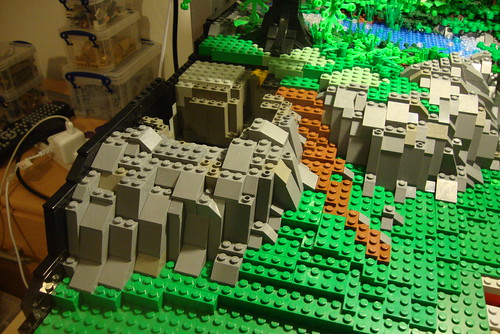
Once we have built up the rocks to the chosen height, we can then lay down some green plates to finish of the hill. The green plates should be mixed around the rocks at the edges of the cliff to give a more natural effect, rather then a plain border of gray with green in the middle.
Posted Image

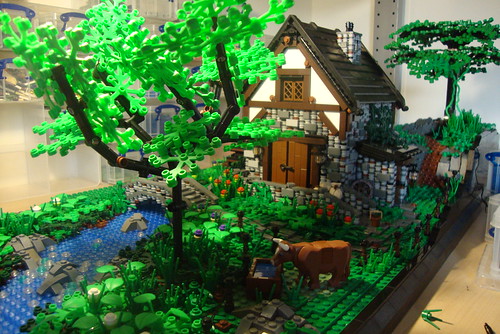
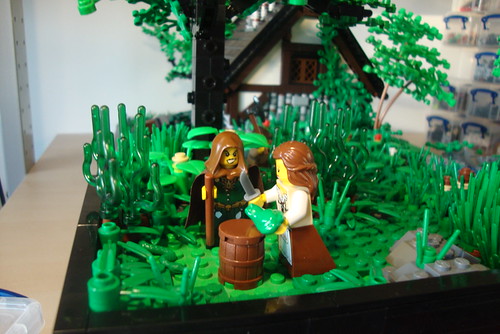
Finally we can add some plants and foliage around the edges making a nice area where villages can go and relax under the weeping willow.
Posted Image

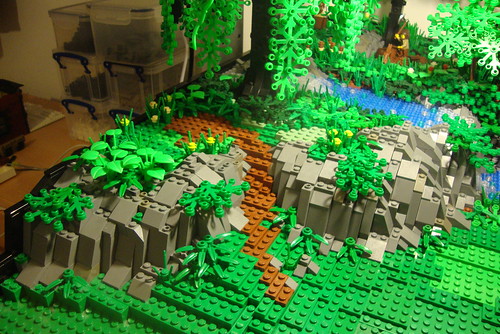
We now have the start of a nice natural area which will make a great background to the village.
Posted Image

Posted Image


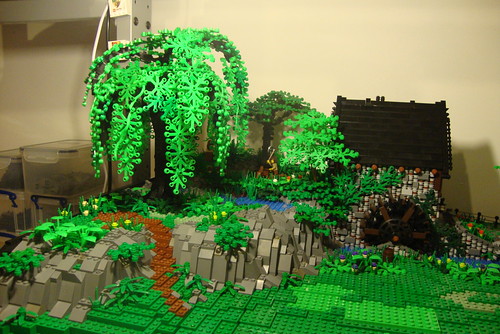
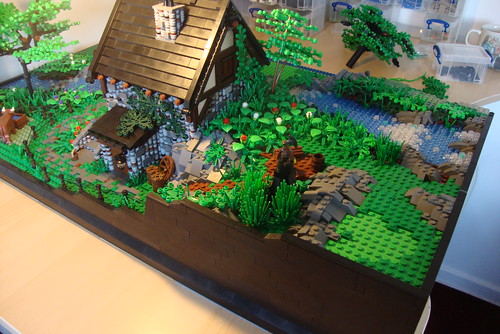
The reason I have ended the hill there, is so I can add a road coming into the village from the back. I can then build up another hill on the other side of the road which is where the windmill will be. This will give a nice raised backdrop for the village.

Next we will start laying some more land and work on some more buildings.

Thanks for reading.
DC

Tuesday, October 18, 2011

Chapter Seven: Details

Now we need to start finishing this section.

To start with , we are going to carry on building up the area behind the mill. Firstly we will make a small muddy track way from the side of the mill up to the top of the raised area. This area will be for a woodcutter and a small witch grove.
We build up the hill using brown plates, making the effect of a muddy trackway worn into the hill.
Posted Image

Posted Image

We build the pathway up to the top and form a small clearing. This is where the woodcutter will be busy chopping wood. Note that I have started building some more rocks behind the clearing. This will form a small area shaded by trees which will be the witches grove.
Posted Image

Posted Image

Now I have started to lay the foundations of the tree trunk. This is simply done using a variety of slope pieces to make the effect.
Posted Image

Now the tree is in place, and I have added a few creepers going up the trunk. As you can see, once a few more trees are in place and the rocks and foliage are built up, the witch grove will have a nice secluded effect. Perfect for the practice of witchcraft, every medieval village has gotta have its own resident witch right? Perhaps Mary Jane will make an appearence here!
Posted Image

We we leave that area for now, as it can't be completed till the other side is built up. So we will now finish the area in front of the mill.

The first job will be to use dark gray tiles to make some worn stone pathways. The mill is a working area, so the pathways should look worn and broken from the constant back and forth of goods. To do this we simply place the tiles in random mismatched positions forming a basic route to the various entrances of the mill from the bridge.
Posted Image

Then around the tiles we place some green plates and the odd brown 1x1 plate for use as spots of mud.
Posted Image

Once that is done, we can place another tree by the river. Note that I have placed dark green tree pieces and very few plants around the trunk. This is because nothing much will grow in this area as its always in the shade. I have also added a patch of sand green plates to the right of the tree, as this will be part of a cow field and so we need to show flattened patches where the cows have been laying.
Posted Image

Now we can start placing some posts around the area to mark the border of the field. I find the best way to fill the edges of these mocs is to fence them off and use the area as the start of a field.
Posted Image

Then we use some black string and tie a knot at the middle of the first post and then wrap around each post all the way to the final post. You can get black thread at most places. I use one that allows you to take off layers of thread making it as thin or thick as you want.
Posted Image

Next we go round again with a second row of thread. This time we clamp the thread between the top of the telescope pieces and a 1x1 round plate.
Posted Image

Once this is done, it will give a nice effect and tone in well with the rest of the scene.
Posted Image

Next we need to make a water trough for the cows. This is done by using two 1x4 bricks with studs on the sides. Put them together and place some blue tiles on top like in the picture below.
Posted Image

Then we connect some brown 1x2 tiles to the studs on each side. You can do this using any colour of brown, dark brown is ideal for this.
Posted Image

Then we have to lean some more 1x2 tiles up at each end of the trough and then put a Lego rubber band over the top to hold those ones in place. This is best done on a flat hard surface where the tiles will stand in place while you put the elastic band over the top. The finished look has a nice effect as the tiles will hang over the corners which gives it a nice look. You can use this trough for many things, it doesn't always have to be water. You could put some tan tiles in for straw effect etc.
Posted Image

We can now place the trough in position and add a cow! As you can see, we are now starting to get a nice natural medieval countryside look.
Posted Image

Posted Image

Next is a shot of the other side of the mill. You can see that the hill needs to be built up and to do this we need to start extending the land outwards now. The stream needs to be finished and the weeping willow needs to be built and placed hanging over the stream.
Posted Image

I will cover this part in the next post. Once this area is complete we can finally get down to building the main village.

Thanks for reading.

DC

Sunday, October 16, 2011

Chapter Six: Trees

 EDITORS NOTE:  I am not Derfel Cardarn.  I am a member of the Derfel Cardarn Appreciation Society.  The following was article is from a Lego online discussion forum www.eurobricks.com. All photos and content belong to the great "Derel Cardarn"

The following was posted by "Derfel Cardarn" on Eurobricks.com discussion forum.  

In the next part we will be building up the remaining landscape behind the mill and I will be adding some trees. So before I start the next part, I'm just going to show a few tree designs that I will be using.

Firstly, in the picture below you will see the 3 leaved Lego plant piece. As you know it comes connected inside a triangle plastic mold that we push out and throw away right? Wrong! Always keep the leftover triangle mold, as this can be cut then straightened out and used for vines and foliage. Its a great useful piece that can be used to wrap around tree trunks and up cliffs and castle buildings.
Posted Image

When people build trees the basic way is to use plates for branches and add the tree pieces on. This works fine, but if your using this technique it can be handy to add some black ariel/lever pieces like in the picture below.
Posted Image
Then you can make some large bunches of tree pieces and then insert them on to the ariel/lever piece through one of the holes. This allows you to angle the tree pieces for different shapes like in the picture below.
Posted Image

This next technique is my personal favourite. This has so many possibilities for tree shapes. It is built using the 1x2 brick hinge which connect at each end. The fact that each 1x2 brick can be bent to a different angle really allows for lots of variation when conecting tree pieces on to them. These pictures below give an example.
Posted Image

Posted Image

Posted Image
These are quick thrown together examples, but with a little time and effort you will be able to create the perfect tree from this method. Also I will add that using this method you can create a perfect example of that Holy grail of trees The Weeping Willow.

Finally, the last tree method I use is from technic parts. This method is used for making spindly looking trees that don't have as many leaves. This is done by clipping lots of technic parts together with 1x2 technic axel's. You use these to make an interesting shape, then clip the tree pieces in the holes using the technic half-pin.
I'm not sure exactly what these particular technic parts are called, but hopefully you will recognize them from the picture.
Posted Image

Posted Image

Well, that's the basic tree designs I will be using. As for height, its really a case of how tall you want them to be. I usually go for a height just taller than the houses or the same size. Tree trunks are really a case of building up bricks, there's not a perfect brick for getting a proper tree trunk effect but the log effect 1x2 brick looks good. Colour is again down to you, brown and black are the best, mainly because there are a lot of elements available in those colours. Dark brown would be perfect, but we are let down by the small amount of elements available in that colour.

Next we will be using these tree designs to create a Witches' Grove behind the mill.

Thanks for reading.
DC