To start with , we are going to carry on building up the area behind the mill. Firstly we will make a small muddy track way from the side of the mill up to the top of the raised area. This area will be for a woodcutter and a small witch grove.
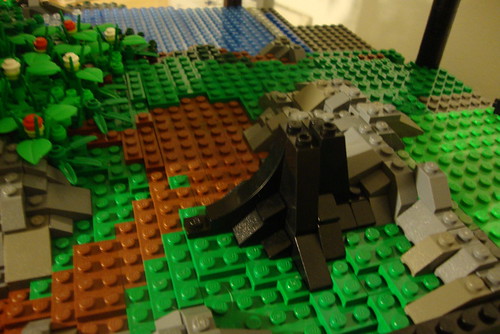
We build up the hill using brown plates, making the effect of a muddy trackway worn into the hill.
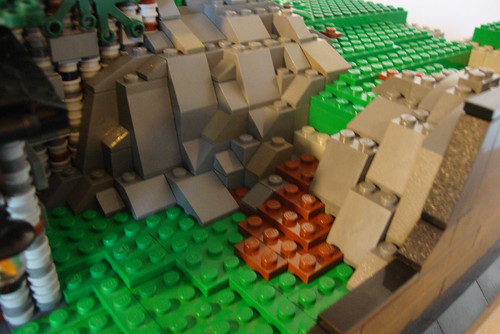
We build the pathway up to the top and form a small clearing. This is where the woodcutter will be busy chopping wood. Note that I have started building some more rocks behind the clearing. This will form a small area shaded by trees which will be the witches grove.
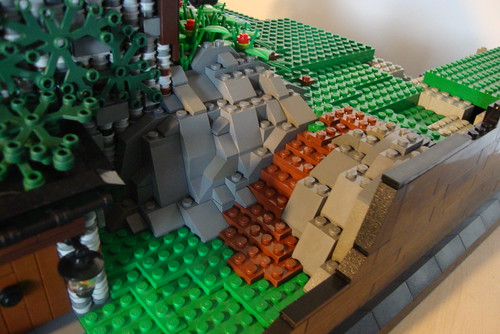
Now I have started to lay the foundations of the tree trunk. This is simply done using a variety of slope pieces to make the effect.
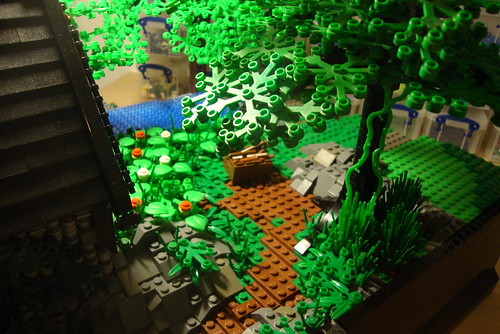
Now the tree is in place, and I have added a few creepers going up the trunk. As you can see, once a few more trees are in place and the rocks and foliage are built up, the witch grove will have a nice secluded effect. Perfect for the practice of witchcraft, every medieval village has gotta have its own resident witch right? Perhaps Mary Jane will make an appearence here!
We we leave that area for now, as it can't be completed till the other side is built up. So we will now finish the area in front of the mill.
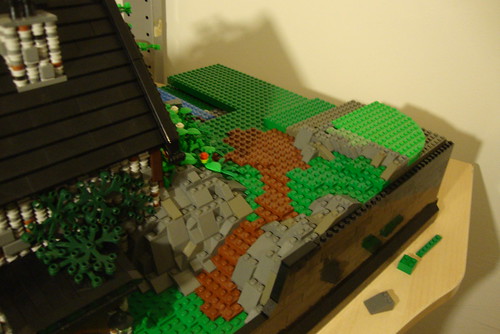
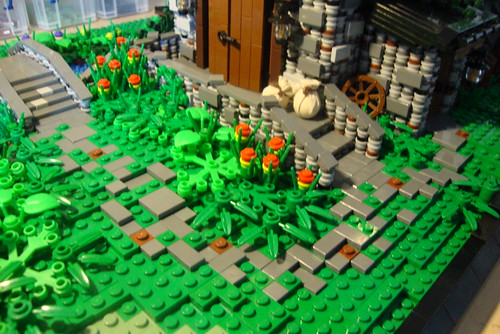
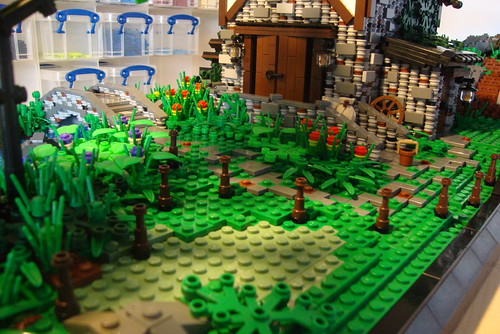
The first job will be to use dark gray tiles to make some worn stone pathways. The mill is a working area, so the pathways should look worn and broken from the constant back and forth of goods. To do this we simply place the tiles in random mismatched positions forming a basic route to the various entrances of the mill from the bridge.
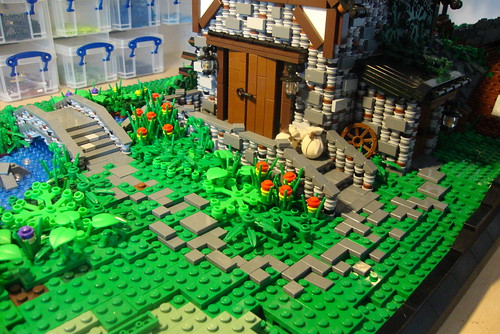
Then around the tiles we place some green plates and the odd brown 1x1 plate for use as spots of mud.
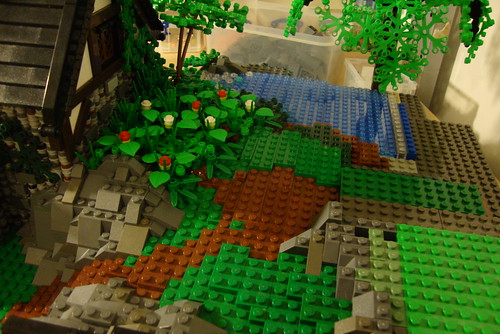
Once that is done, we can place another tree by the river. Note that I have placed dark green tree pieces and very few plants around the trunk. This is because nothing much will grow in this area as its always in the shade. I have also added a patch of sand green plates to the right of the tree, as this will be part of a cow field and so we need to show flattened patches where the cows have been laying.

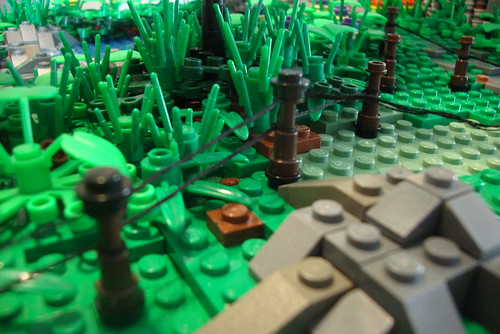
Now we can start placing some posts around the area to mark the border of the field. I find the best way to fill the edges of these mocs is to fence them off and use the area as the start of a field.
Then we use some black string and tie a knot at the middle of the first post and then wrap around each post all the way to the final post. You can get black thread at most places. I use one that allows you to take off layers of thread making it as thin or thick as you want.
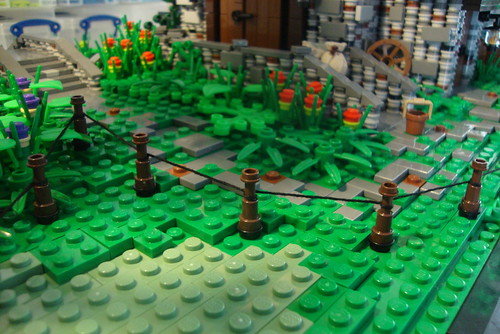
Next we go round again with a second row of thread. This time we clamp the thread between the top of the telescope pieces and a 1x1 round plate.
Once this is done, it will give a nice effect and tone in well with the rest of the scene.
Next we need to make a water trough for the cows. This is done by using two 1x4 bricks with studs on the sides. Put them together and place some blue tiles on top like in the picture below.
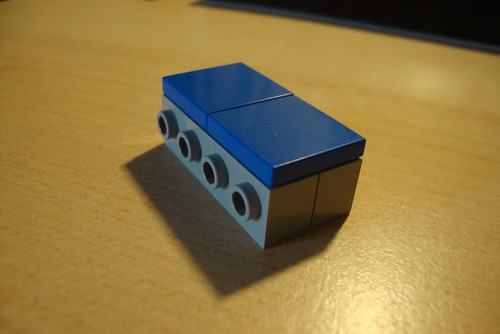
Then we connect some brown 1x2 tiles to the studs on each side. You can do this using any colour of brown, dark brown is ideal for this.
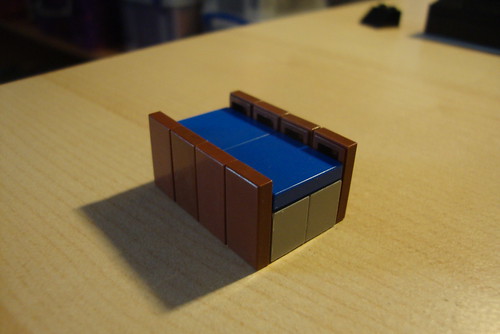
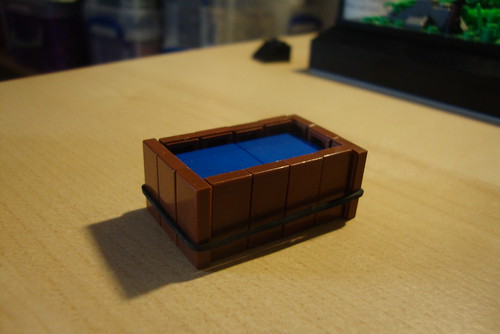
Then we have to lean some more 1x2 tiles up at each end of the trough and then put a Lego rubber band over the top to hold those ones in place. This is best done on a flat hard surface where the tiles will stand in place while you put the elastic band over the top. The finished look has a nice effect as the tiles will hang over the corners which gives it a nice look. You can use this trough for many things, it doesn't always have to be water. You could put some tan tiles in for straw effect etc.
We can now place the trough in position and add a cow! As you can see, we are now starting to get a nice natural medieval countryside look.

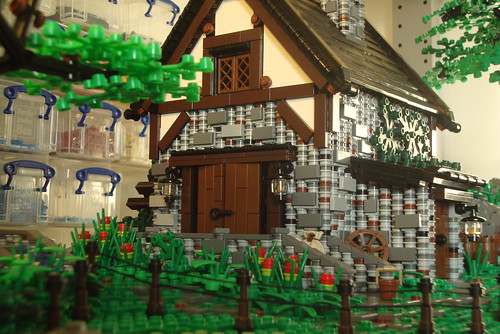
Next is a shot of the other side of the mill. You can see that the hill needs to be built up and to do this we need to start extending the land outwards now. The stream needs to be finished and the weeping willow needs to be built and placed hanging over the stream.

I will cover this part in the next post. Once this area is complete we can finally get down to building the main village.
Thanks for reading.
DC
No comments:
Post a Comment