The following was posted by "Derfel Cardarn" on Eurobricks.com discussion forum.
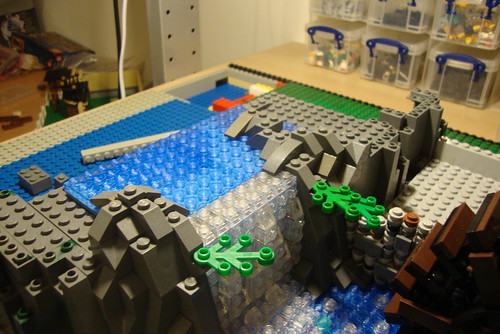
Now its time to do the waterfall.
Waterfalls can be tricky as its easy to get the wrong look, but a good waterfall no mater how big or small can make a great addition to a landscape. Luckily a simple solution can be reached using mostly 1x2 and 1x1 clear plates.
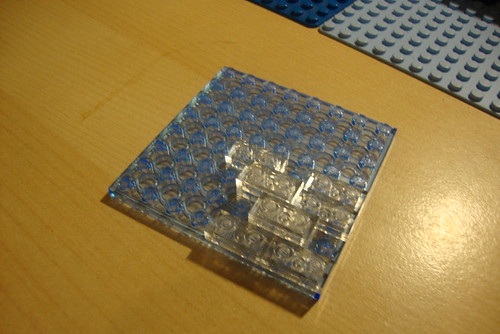
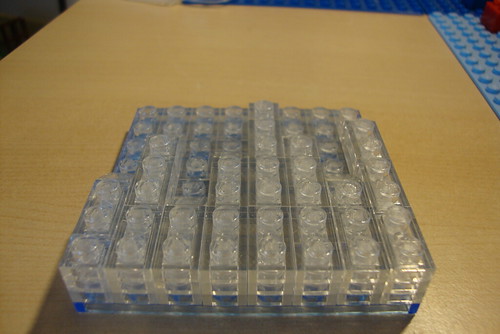
Firstly I use an 8x8 trans medium blue plate as used for the river, and cover it with a layer of 1x2 clear plates. Then I start another layer from the bottom going up in different lengths topped off with a clear 1x1 wedge piece.
Once that is done, we need to fit it in place. There are 2 methods of doing this depending on what bricks you have. I have mocked up a close up of the two different ways below.
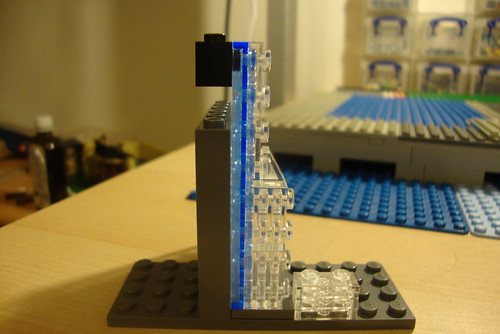
In this first picture you can see I have conected the waterfall piece using a 1x1 with stud. Notice there is a gap between the vertical waterfall and the horizontal clear plates at the bottom. If you are lucky enough to have Clear 1x2 tiles, you can use them here to fill that gap and so connect the waterfall in this method.
If like me, you have never thought of buying 1x2 clear tiles, then we have to do it another way.
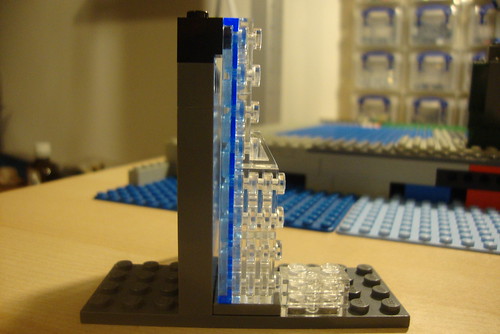
In this picture I have the same set up, but have used a 1x1 headlight piece instead of the 1x1 brick with stud. Because the headlight brick has a indent of half a plate, if we connect a 1x1 plate onto the indent we then get an overhang of half a plate. This means that the vertical waterfall piece will now sit up against the clear plates on the ground. You will still have a few little gaps inbetween the studs, but it doesn't notice. You will also have half a plates width gap between the waterfall piece and the wall behind, but again, it wont be scene.
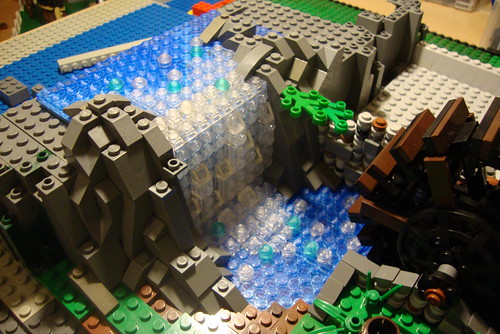
Now we can put it in place.
I have used clear headlight pieces to connect it, rather then the black ones in the picture above. I have also placed 1x2x5 trans blue bricks behind the waterfall to give it a deeper colour.
Now we can build up some of the rocks on either side of the waterfall. To do this, all we do is use different sized dark grey slope pieces and stack them randomly till you get an effect you are happy with. Its really a case of trying different slopes in different places till you achieve a gradual slope and you are happy with it.
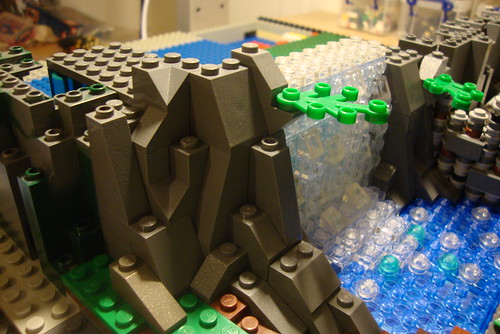
Its also handy to have some dark grey wedge pieces, as you can add those on to where ever you feel needs it to help with the effect.
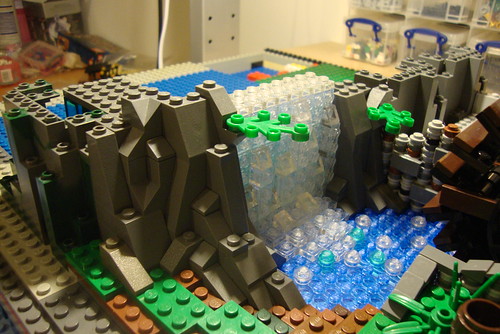
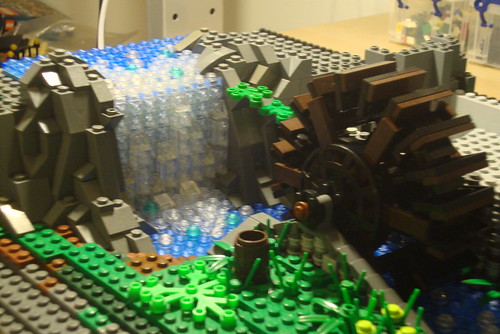
Then we need to level off a small area at the top so we can build a small section of stream.
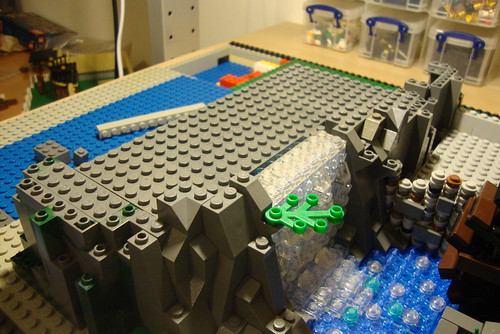
We then lay a small section of stream, using the same method as before, and then add some more dark grey slopes to finish the top of the rock work around the waterfall.
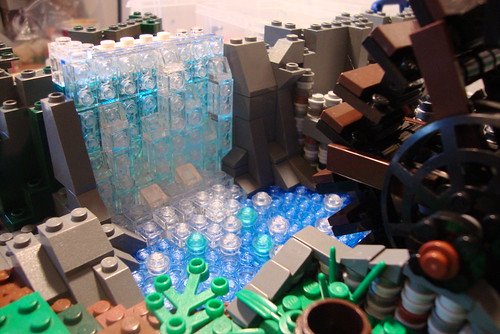
To finish it off, we then add some more 1x2 clear plates and use these to connect the waterfall to the stream. A few clear and trans light blue 1x1 flat rounds have also been added to help give the effect of bubbles and foam.
The waterfall should now look something like this.
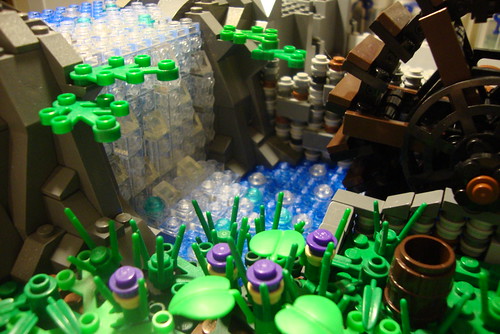
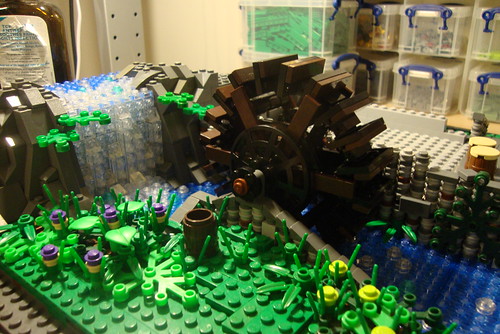
We can then add some foliage around the bottom to complete the look. The top however, has much more work to be done on it yet, but that will come later.
When it comes to building larger mocs like this, I prefer to not have a plan. Yes, I do start out with a vague image in my head, but I prefer to just build and see how it developes. Having reached this point, I can now see tha
t we will have a hill all across the back of the moc, with a cottage above the mill on the right and a windmill at the top of the hill on the left. Then at the bottom of the hill to the left of the mill we will have the main village with its houses and traders. Maybe a pond as well.
Once the hill is all built up behind the mill we can look at placing some trees, then finish of the whole right side of this moc before moving on to the left.
But first, we can now get that Mill finished!
Next post coming soon!
Thanks for reading.
DC
No comments:
Post a Comment