The following was posted by "Derfel Cardarn" on Eurobricks.com discussion forum.
Hello there.
This thread will be for just the guide only. No comments here please, if you have any questions and comments please post them in the other existing thread.
To start off, i am going to briefly cover my technique for building houses in its simplest form. The more advanced additions and techniques will be covered as I build them through out the guide. So here is a little idea of how we will be tackling houses during the guide.
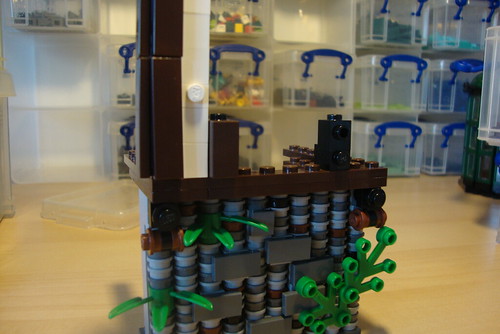
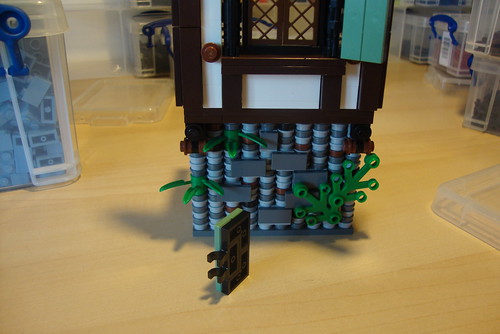
Here we can see a basic wall of 1x1 round plates.
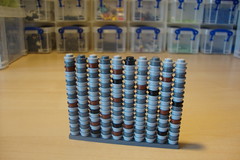
Note that the primary colour is light grey then dark grey followed by odd spots of brown then black. You can also add some sand green if you have them as it gives a nice 'moss' effect. Tan also works well added in.
As you can see, there are lots of small gaps and its not very stable. So we have to build a second wall with plain bricks behind the rounds like so.
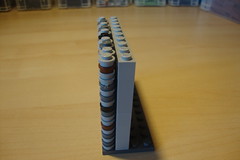
This also comes in handy when making an interior as you have another wall on the inside to add detail with out certain clips and bricks being visible from the outside.
Once we have this, we can add the planking on top which holds the two walls together making them very strong and sturdy.
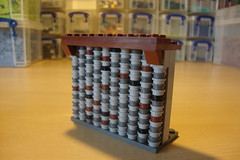
But, a plane wall of 1x1 rounds can be a bit much, so we have to add in some tile brick work to break things up a bit. This is done with headlight bricks and 1x1 bricks with stud.
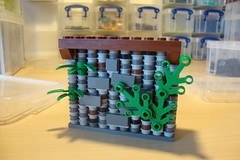
Also, we can add some plants if need be, the basic ones are the 3 leafed 1x1 round part and the classic tree/leaf part. Both can be used to great effect which we will cover later.
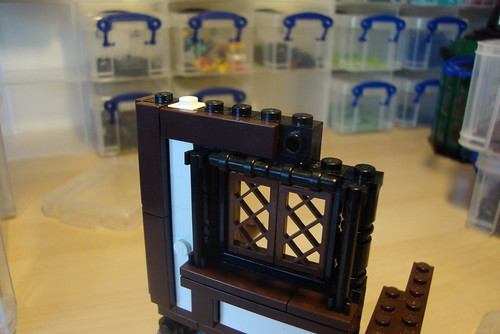
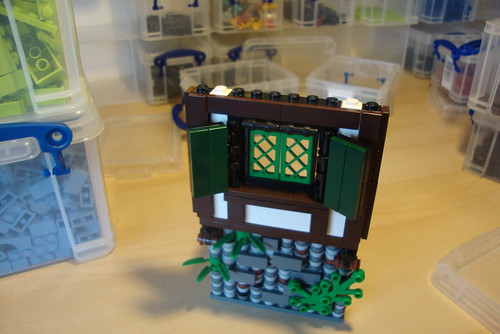
Next we start on the next level. Notice that I use a double layer of brown plate as the base for the timber section. It looks more prominent then a single and looks more like the tile width, which we will build the rest with.
We do the corner of the wordwork with 4 black 1x1 bricks with stud(not the headlight piece). Between each brick we place 2 1x1 plates. You should end up with 2 bricks pointing one way and two pointing the other. This will allow us to clip on a height of 2 1x4 tiles to get the corner effect like so.
Now i am going to switch to dark brown, as that is the colour I will be mostly using, although you can use reddish brown if it is more availible to you.
Here you can see some of the problems encounted with dark brown. As there is a limited amount of plates in this colour we have to make the best of what there is. The easiest and most widely availible is the 2x6 plate. The Troll Battle Wheel set was a great source for these. As you can see in the picture below, at some stages we will have to have the plates sticking inside. This isn't a problem with this section as you can build a floor anyway, but can be tricky in other areas. Of course, if you don't need an interior and just want a village that looks good then it doesn't matter anyway.
I have used white instead of tan here, as I think it works well with dark brown and makes a nice change from all the tan house around. Also note that the height of the 2 tiles is equal to 6 bricks and 2 plates. This is very handy, as instead of using 2 plates we can add a headlight brick on its back which will be used to attach the horizontal tiles as seen in the picture below.
Next we come to adding a window. First we need to use the height of one 1x2 tile. These are connected using a combination of a headlight brick on its back with a 1x1 with stud, on the top, like in the picture below.
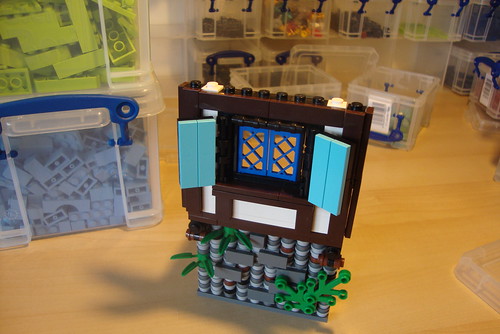
Next we can place the window section top. This is made up of a 2x6 plate with a row of tiles and a 1x6 plate. The window then sits on the 1x6 plate and on either side we use a combination of 1x1 rounds and plate rounds with a clip on the top and bottom. On these clips we attach the pole/stick pieces which will hold the wooden shutters. Reddish brown is the most common colour of the pole/stick piece and works best along with black, but you can use what ever colour you wish. I like to add 2 plates/with handle or rail just above the window piece. All can be seen in the picture below.
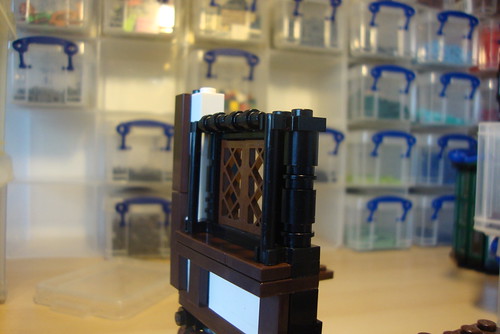
Next we use some 1x1 bricks with stud on side again. Placing these on top of the window and attaching tiles horizontally will bring you exactly level with the top of the vertical corner tiles like so.
Now we have something like this. As you can see, unfortuantly 1x1 tiles in dark brown arn't yet availible, so I have just added a couple of rounds next to the window where the horizontal tiles would usually go. You can use any thing for this, a tooth plate looks good as well. This wont matter on bigger buildings of course, as we can make it wide enough to fit a 1x2 or 1x4 tile in.
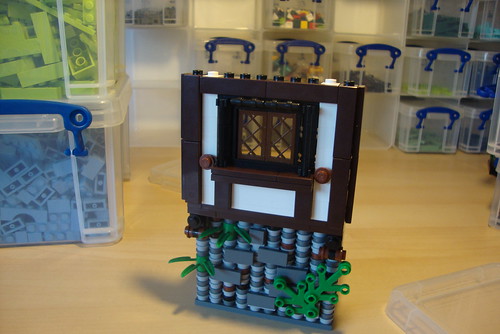
Now we come to the shutters. This is a very simple detail but really adds to the look.
Its simply a case of getting 2 1x4 tiles and using 2 corner plates and 2 clip plates on the back to hold it together, as seen in the picture below.
You can then use any colour of your choice, but I find that earth tones like sand green, dark brown, brown, dark tan etc work best. You can also use them in combination with different colour window as well, like the examples below.
Green and dark green
Blue and sky blue
Next we start a roof.
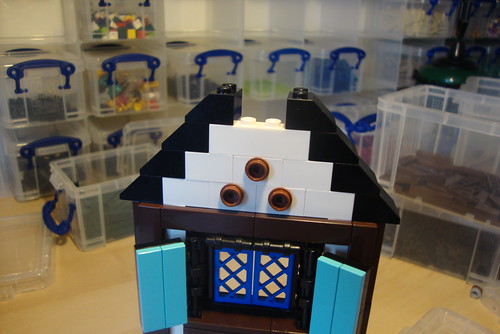
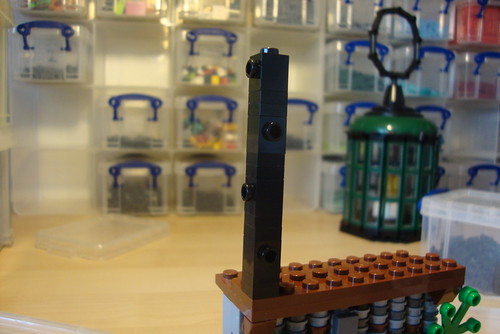
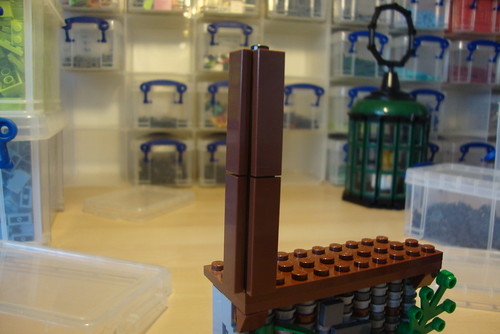
Note that i am not overhanging the roof bricks, as the step effect it produces can look very blocky. Instead we use a different technique. Using 2 clips with the new hinge plates attached we can create a nicer gable effect like in the 2 following pictures.
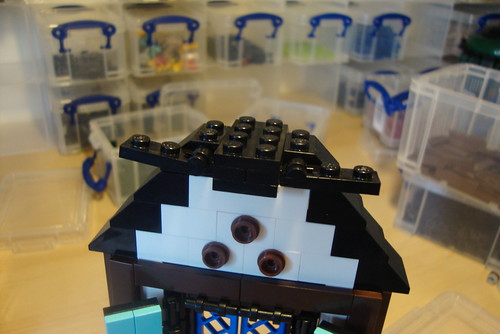
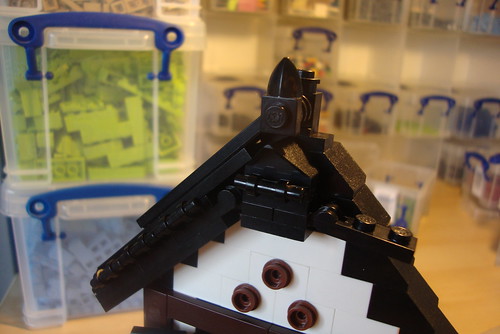
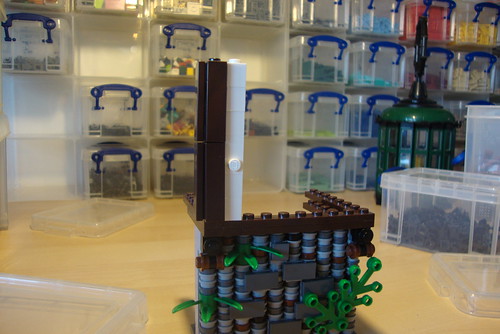
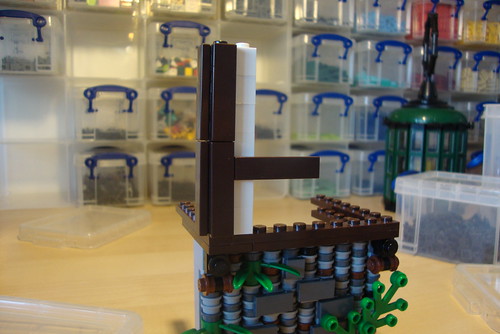
As you can see, i have added a jumper plate on the top roof section with a headlight brick that allows you to attach some rounds and a black tooth plate. This results in the finished effect seen below.
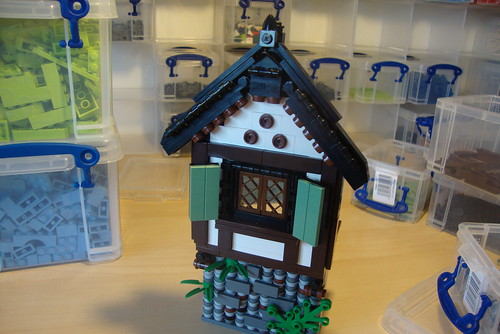
You can also add a different colour to the gable to match other parts of the house. for example, if you have dark green doors and shutters, you could add a few dark green plates to the gable to subtly tone it all in.
Well, thats the basic house building technique we will use through out this guide. If you would like to view any of the pictures in a bigger size, then here is the link to the set: http://www.flickr.co...57627719756491/
Now we can begin with the main guide. I will post the first section asap!
No comments:
Post a Comment