The following was posted by "Derfel Cardarn" on Eurobricks.com discussion forum.
Right then, time to get properly started. In this part, we are going to cover a section of the base, the stream/river and some landscaping.
When it comes to laying out your base, a lot of people like to plan and lay the whole base out and build it all first. I don't do it this way. The reason is, that I always find you never really know how much space you are going to need when building something like this. Its far easy to build the base as you go along, that way, if you need that extra 16 stud width or depth, you can easily add it without having to take apart what you have already done.
So to start, I will lay some base plates down and start from the front right corner and build out. As you can see in the picture below, we build up the edges of the base with black bricks. You can use any colour but black looks best. the sides are built to a height of 2 bricks and one plate. This allows a bit of depth to lay the river through and will give a stronger structure.
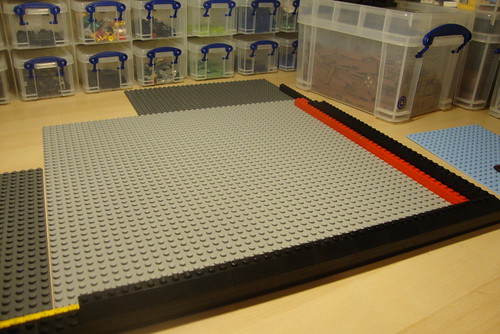
As you can see I am using roof pieces to give the edges of the base a nicer look, and then I top them of with tiles. Dark brown looks best, but a lot will be used, so black is the best bet as they are cheaper to get hold of and come in 1x8 sizes.
In the picture below you can see some basic foundations on which you can lay a lego base plate.
Because the black bricks are a height of 2 and 1 plate, when we lay the baseplate on the foundations it will lay flush level with the top of the black bricks like the next picture shows.
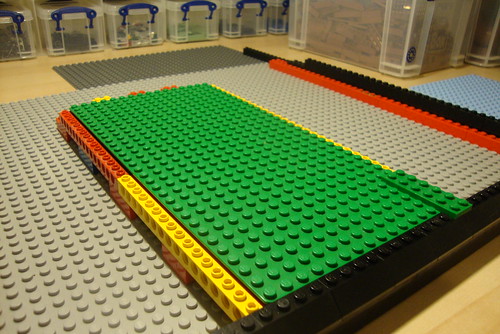
Using large green base plates like these are helpful for covering large areas of green where normal green plates would take an age to do. Plus it also save a lot of plates. So that is an example how we will create most of our base/foundation. But for now, we shall start the all important stream/river.
This should always be built first, and then the village builds up around it. All towns and villages were built around or near water, and its the same with Lego.
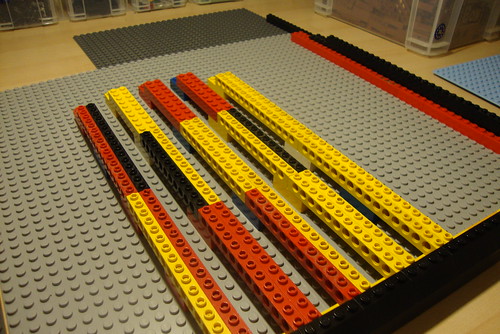
So to start, we build a rough guide of where the stream will run. For this, we lay one level of bricks and then put plates on top, as we dont want it to be as high as the black base. It doesn't matter what colour you use, and the same goes for all the foundations. Its a good chance to use all those multi coloured bricks that you never usually use. If you want to make foundations even easier, a tip is to use Duplo. Big bulky Duplo bricks are compatible with normal Lego and are handy for bulking out your landscape quicker.
Here you can see the foundations for the stream.
Once we have done this, we can start laying down some water.
Now, there are lots of ways to make water, everyone has their own preference. Tiles work well, as does snot techniques, but they have a tendancy to look very lifeless. I was always a fan of using different shades of blue tiles for water. It works well for calm mill ponds and slow rivers. But for if you want a bit more active look, then studs is the way to go.
For this stream, I am going to use tiles and studs for a better effect.
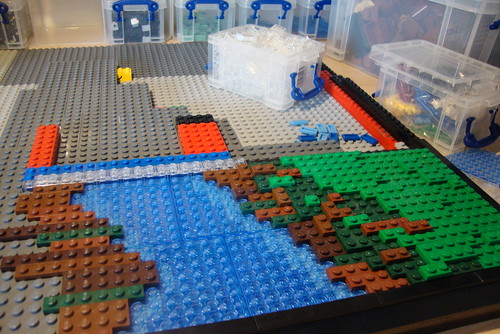
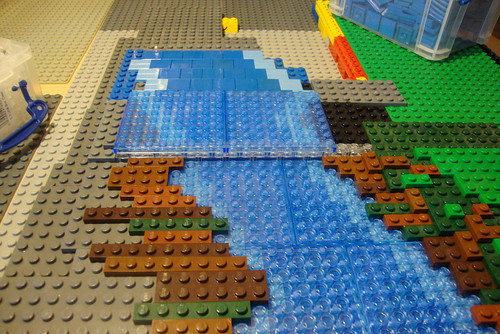
First, we lay out our stream with blue tiles for the middle and medium blue for the edges.

Note I have built up the edges of the stream with plates, so it is the same level as the tiles. I have also added a row of clear bricks which are used to sepperate where the stream steps up a level.
Then on top of the tiles I lay some 8x8 trans medium blue plates. This is an effect I used back on a Boat House moc I made, but I have never tryed it for a whole stream before. The effect of the tiles can be seen through the plates.
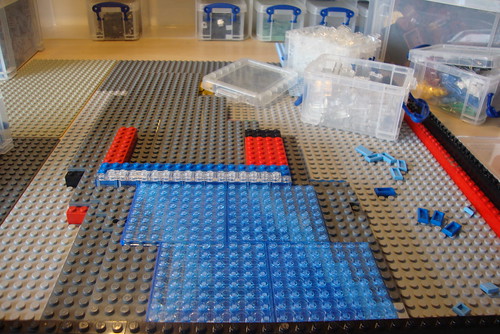
Then once again we add some more plates round the outside of the stream to bring the everything level with the trans medium blue plates.
Now we can start laying out the banks of the stream. To do this, we can use a mixture of old brown, dark brown, reddish brown and dark green like so.
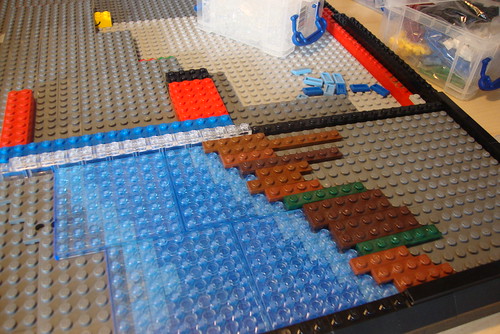
On top of that layer, we then add another layer of dark green and normal green.
Then finally we add a 3rd layer of normal green with a few small brown plates here and there.

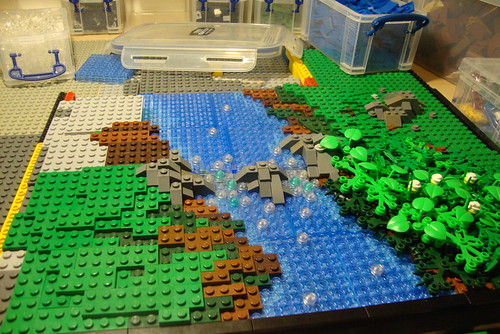
Then we can start repeating the process on the other side.
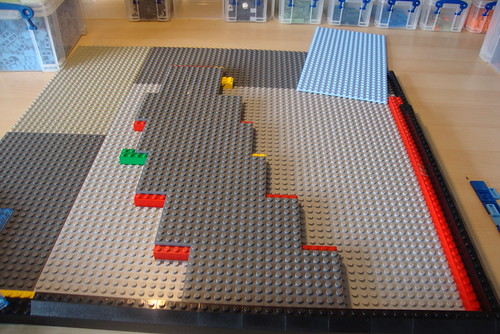
Now, we have a bit of space to use a base plate, so we build the foundations like earlier and lay the base plate on top.
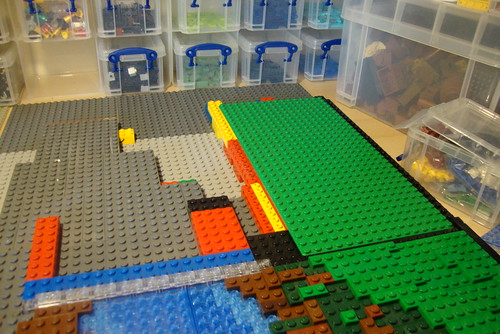
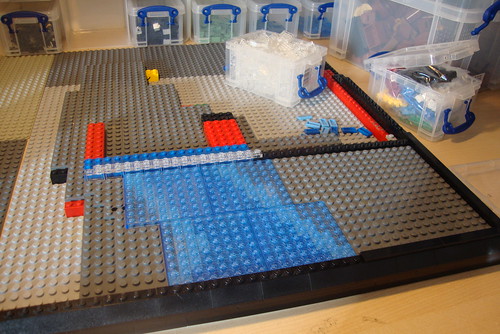
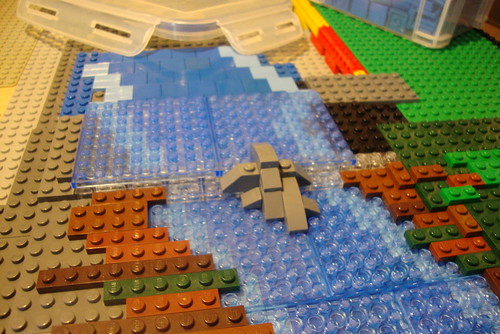
Now we can continue with the stream by building up the level behind the row of clear bricks.
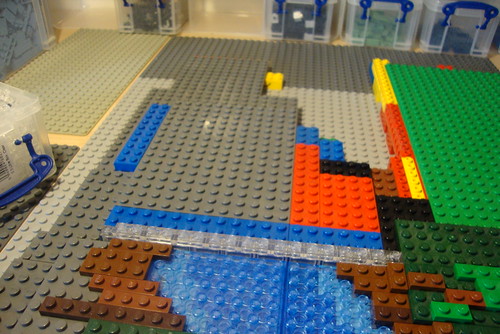
Then like before, we lay the tiles out.
Then build up the outside to the same level as the tiles and lay the 8x8 plates on top. These will rest on the top of the clear bricks as well.
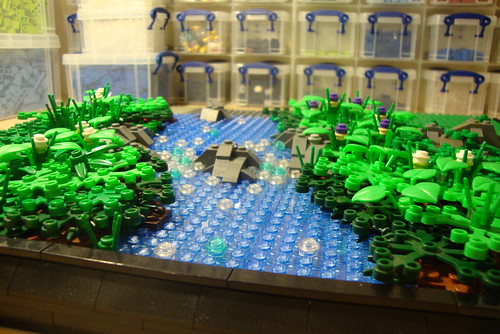
We now need to complete the step in the stream, so first we lay one line of clear plates up against the step and then use some grey slopes to make some rocks in the middle.
Then we add a few more rocks either side of the stream and add some clear 1x1 rounds to get the effect of the flow through the rocks.
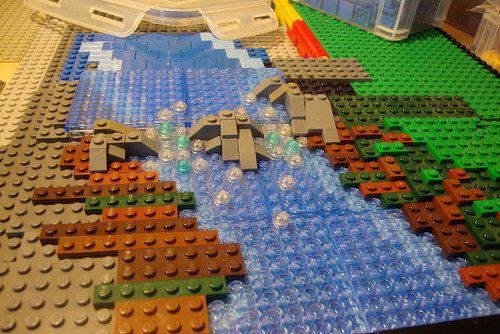
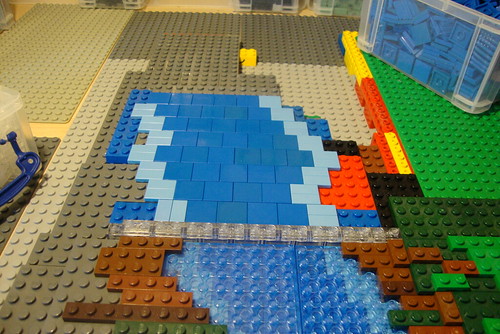
Now we can carry on with some more of the stream, using the same techniques as before.

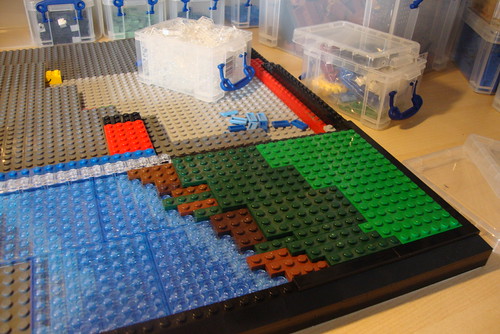
We can now also start laying some foliage. To start, we lay out some dark green spiky appendages, which are used to imitate weeds etc.
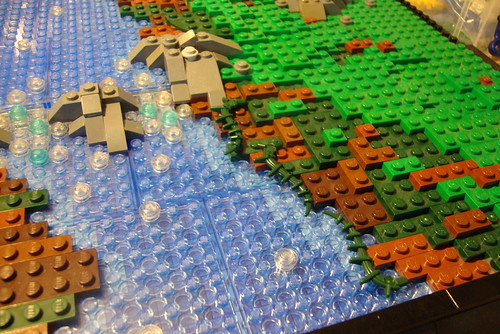
On top of those, we then lay dark green tree pieces which will also hold the spiky parts in place. The tree pieces should overlap the stream in places for a more natural look.
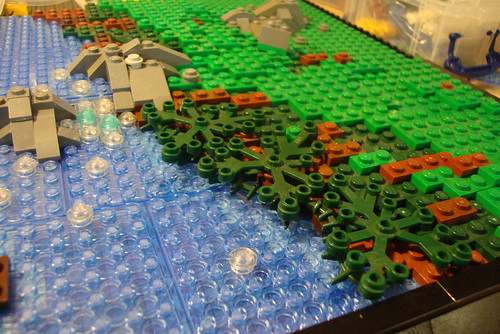
Then we add some lighter green tree pieces and a selection of other plant pieces. Don't worry about attaching the tree pieces firmly down, as they look better if they are sticking up in places. The same goes for the other plant pieces. You can wedge somein at different angles for a nicer effect.
Repeat all of these processes for the other side and you will then be looking at something like this.
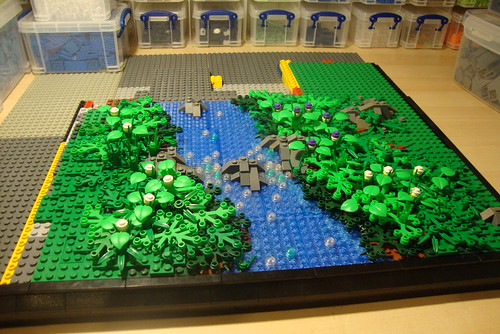
You can see from this angle that you get a nice natural curve to the stream.
Note I have also added in a few wild flowers made with 1x1 rounds.
Well, that is a small section of the stream, and gives you an idea of how it will all be built. Most of it will be built using the processes above, but there will also be a few parts like waterfalls, over hanging trees and high banks which I will cover latter in the guide. You dont have to build a stream using the 8x8 trans plates, it will work just as good with normal blue plates or just tiles and snot. Its up to you. Just remember to try and use darker colours near the edge of the stream as these would be damp and muddy. The look we are going for is an overgrown natural look.
The next step is where things will really start coming to life, as we will tackle our first building, the Water Mill, as well as a small water fall and bridge.
Will post asap
Thanks for reading
DC
No comments:
Post a Comment