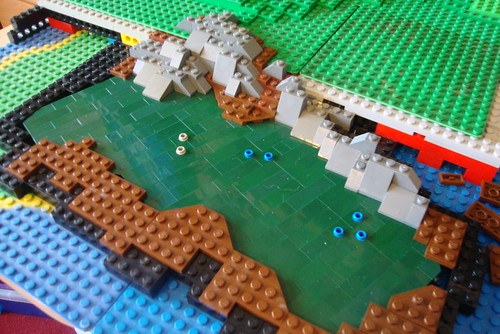
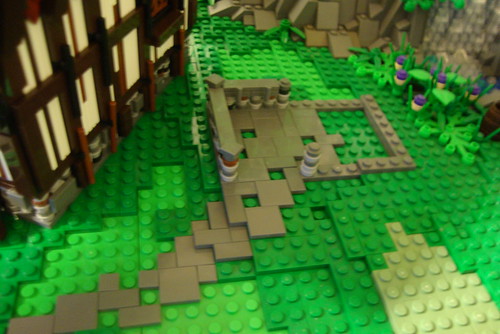
First we need to build the pond. The SNOT technique works well for this as its still water. I have used dark green as it gives a nice murky pond water effect. As you can see in the picture below, I have built a shape out of dark green bricks and then surrounded it in where I can with black bricks. This will keep it locked into place. You may also notice some half technic pins sticking up in the pond, these are merely to attach some plant pieces to.

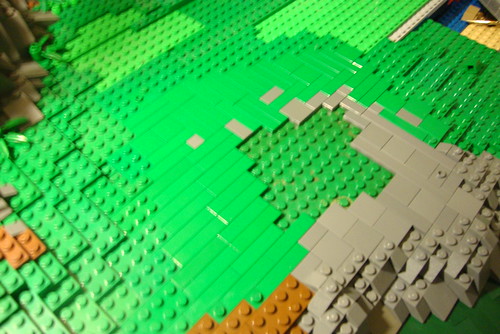
Next, I have started to add a combination of brown plates and dark gray slopes. This is done the same way as before.
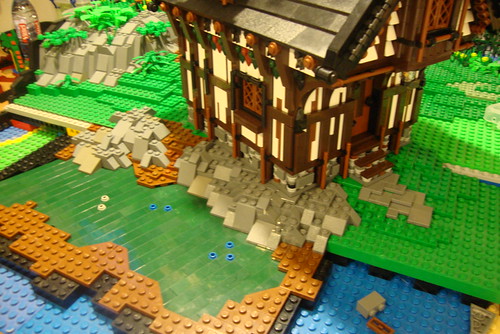
Once the rocks and mud have been built up, then we will need to connect the house. First you will need to lay the house roughly in position where you want it. Once you are happy with the angle of the house, you will then need to attach a jumper plate to one of the corners. Then you will need to mark the area of the house with tiles. As you can see in the picture below, I have used dark gray tiles around the rocks and green tiles for the rest.
Now we can place the house on the tiles where it will sit at an angle. Remember to use jumper plates on a few of the corners where you can. This will hold the house in position.
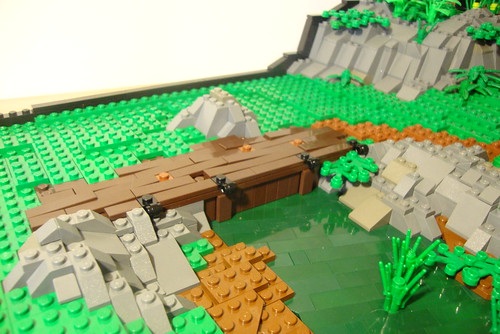
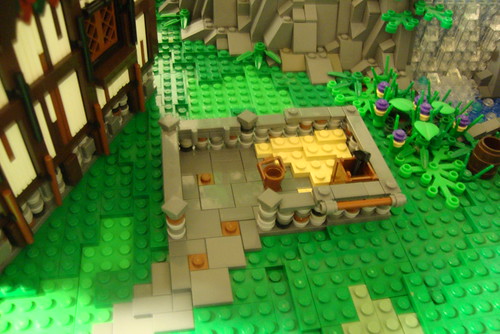
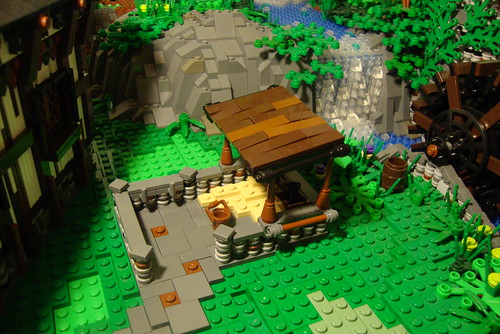
Now, at the far end of the pond I have added a small wooden platform which acts as a sort of bridge where the path passes over the end of the pond. This is simply done using headligt bricks on their side and clipping 1x2 tiles across. Then adding plates and tiles running across the top.
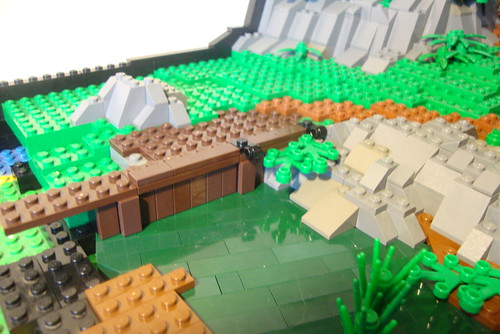
In this picture you can see the finished platform/bridge. I have only pressed down one end of each tile on the bridge. This gives an old warped effect. The trick is to build up the rocks and landscape around the platform so it looks like it really is built into the land.
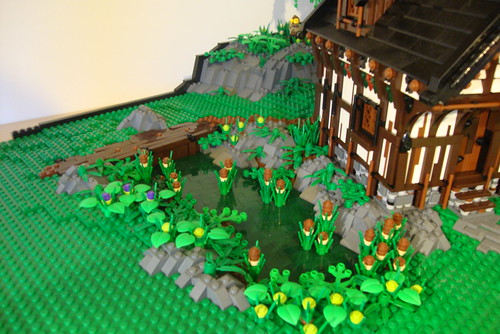
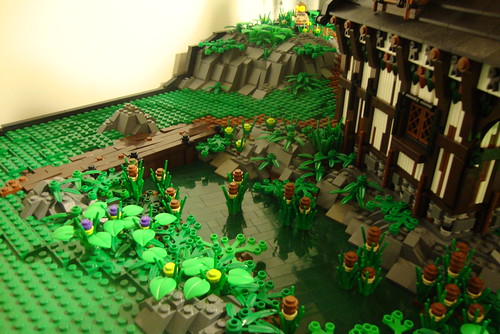
Now the pond is finished. You can then add foliage where you want to. I have added quite a few bulrushes as they are commonly found in ponds. These are made using brown and tan 1x1 round plates. Building the green landscape should be pretty simple now as I have covered it a few times already earlier in the guide. So in these pictures you can see I have built up the green land around the pond.
Next, we are going to build a small outhouse/storage area next to the house. We start off by laying some dark gray plates as the foundation.
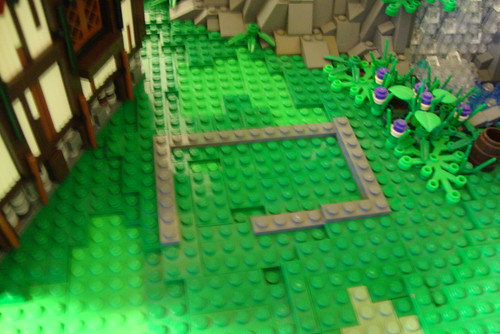
Next we add some tiles for the path and start building some of the walls using 1x1 round plates.
Keep building up the walls to a height of about 5 plates. You can add a few 1x1 brown plates for mud and some tan plates for straw. I have also added a box, a bucket and some 1x4 brown pole pieces clipped to the sides which make good places for the villagers to tie their horses to.
Now we need to make some supports for a small roof. To do this I have used 4 1x1 round cone pieces. In these I have put a 1x4 pole piece. To give the roof a slight slope, I haven't inserted the two poles at the back all the way in. They stick up higher than the front two.

Now we need to make the roof. This is very simple, just a 6x8 plate with tiles attached on top. I have only attached the tiles lightly, so they give an uneven and old warped effect.
Place the roof on top of the pole pieces. The poles should inline with the gaps underneath the roof. It wont be attached, but it will lock into place and only fall off if you turn the whole moc upside down!
In these pictures you can see the completed storage building. I have also added some more string fencing around. This is done the same way as I covered before.
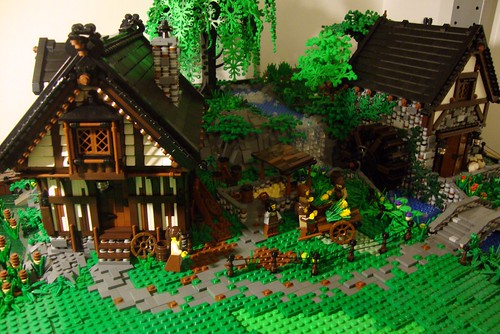
From these pictures it is clear that something needs to be placed at the back behind the mill. Something to give some depth and background. So I have decided to add a tower which will serve as a watch tower. I will cover that in the next section.
Stay tuned!
DC
No comments:
Post a Comment