Friday, October 14, 2011

Chapter Five: The Mill and Small Trees

 EDITORS NOTE:  I am not Derfel Cardarn.  I am a member of the Derfel Cardarn Appreciation Society.  The following was article is from a Lego online discussion forum www.eurobricks.com. All photos and content belong to the great "Derel Cardarn"

The following was posted by "Derfel Cardarn" on Eurobricks.com discussion forum.  

Hello there!

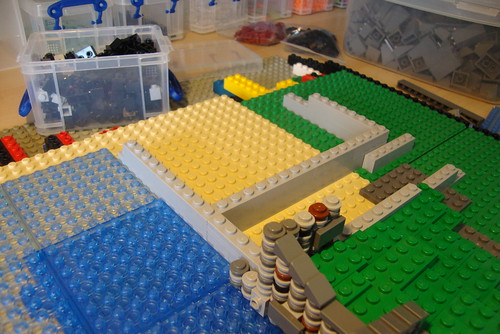
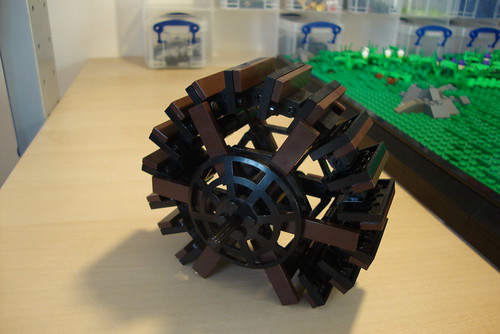
Right, its time to get this mill finished!

I'm basing the design on one of my previous mills that I built which is one of my personal favourite mocs. I was really happy with the design, so I thought I would use parts of it here.

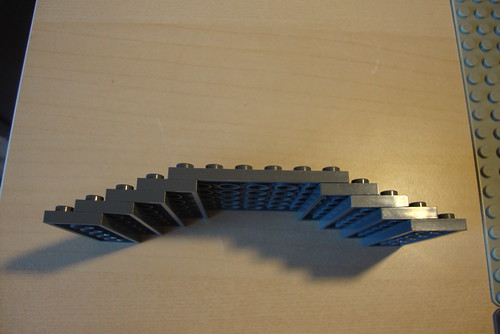
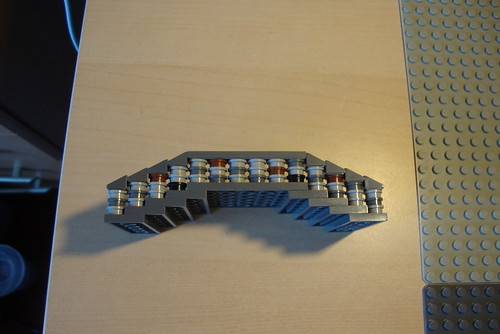
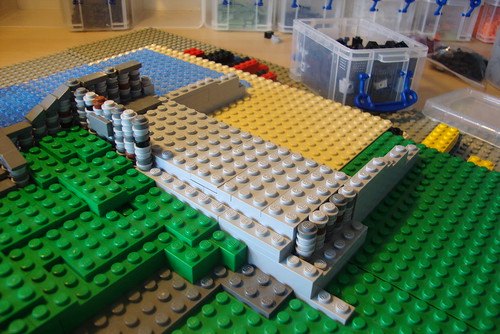
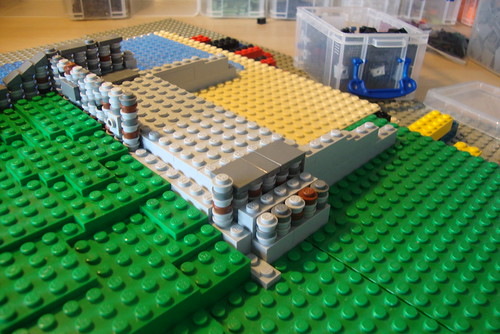
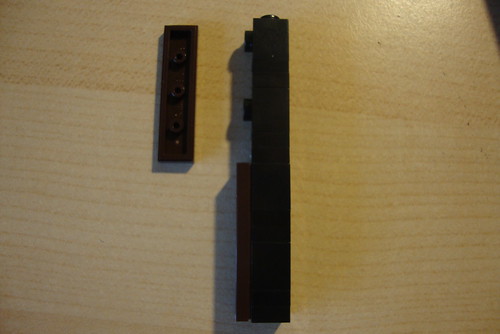
To start off, we need to get the main large doors made. These are quite simple and consist of a 2x8 plate and a 1x8 plate joined together to make a 3x8. On top of that we add some brown tiles and a brown jumper plate to attach a door handle on. On the other side, we strengthen the doors with some 2x3 plates and add to 1x1 clip plates, as seen in the picture below.
Posted Image

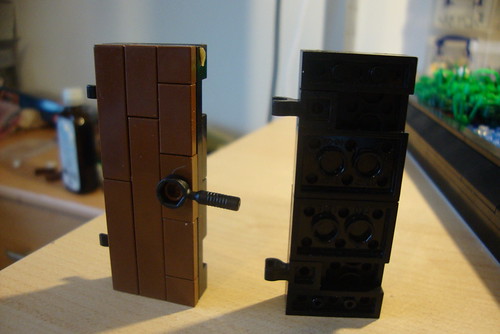
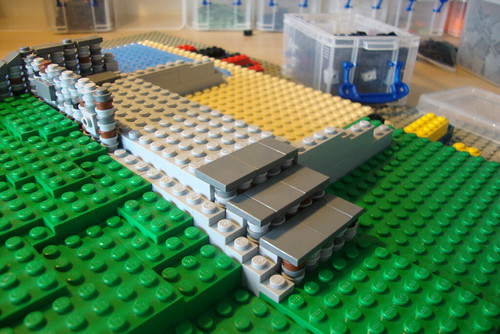
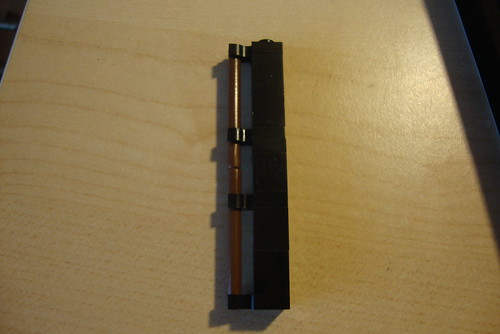
Then, we need to build a pillar the same height as the doors using a combination of 1x1 bricks and 1x1 clip plates. We attach two pole/stick pieces to these. This will enable us to clip the doors onto them.
Posted Image

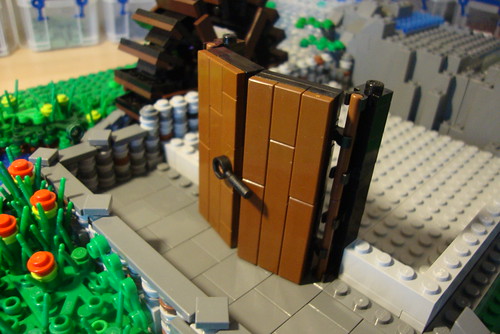
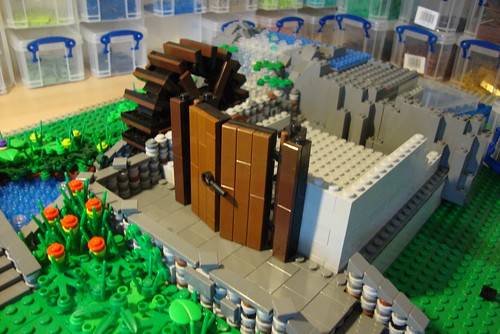
You can now see the doors clipped in and put into place.
Posted Image

Next we need to make the frame of the door. We will do this in dark brown, and make the vertical supports first. This is done the same way as the woodwork in the house at the begining of this thread. A simple task of using four 1x1 bricks with stud, with two 1x1 plates between each one. We can then connect two dark brown tiles to this as seen in the picture below.
Posted Image

Then place in position either side of the doors.
Posted Image

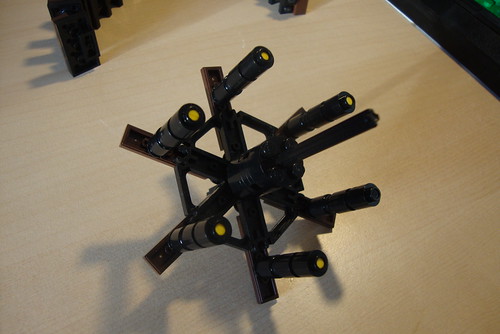
We then need to build 2 pillars of 1x1 round plates with a headlight brick at the top of each one. These need to be the same height and level as the doors and dark brown tiles.
Posted Image

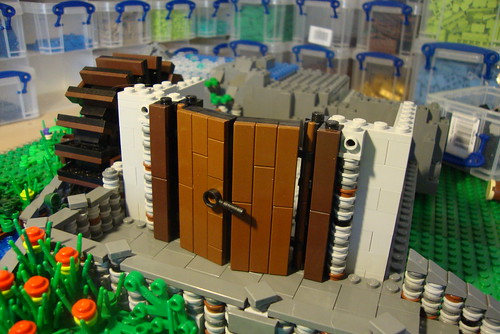
Then we add the horizontal top part of the door frame. For this we use two 2x6 dark brown plates with tiles on top. We can then also add the 2 lanterns which clip into the headlight bricks on either side.
Posted Image

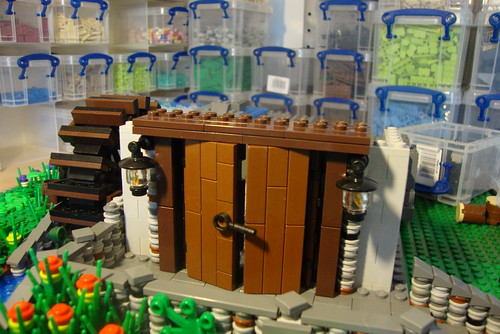
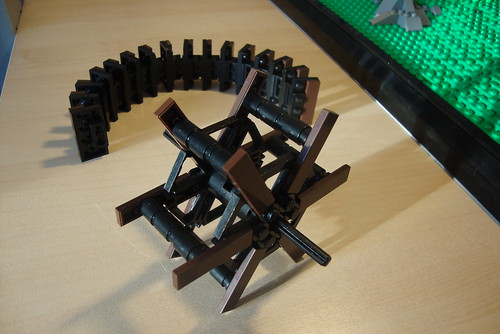
Then its a case of building up the outer wall of 1x1 round plates and remembering to add some tiles here and there to break them up. It should now look something like this.
Posted Image

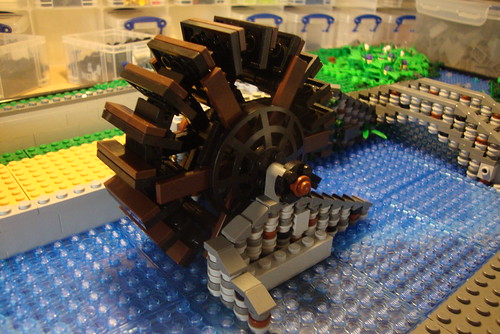
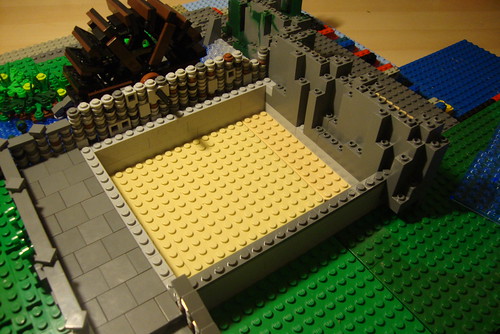
Now is the time to start adding some interior if that is what you want. You could also use Power Functions to make the wheel turn, but that's up to you. I have just added a very basic interior as its not going to really be seen.
Posted Image

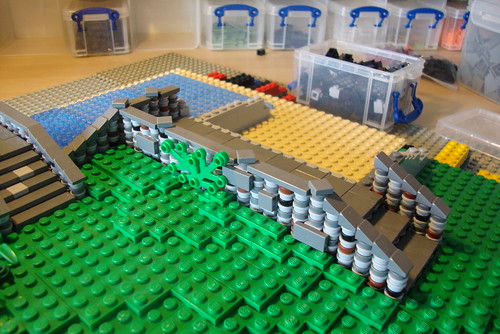
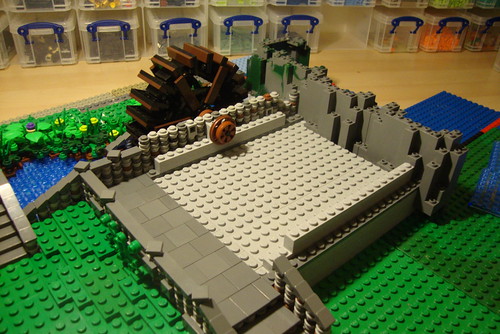
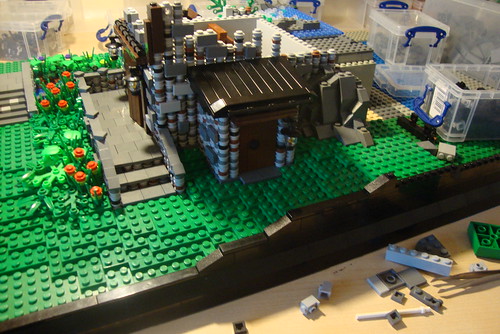
Next we turn our attention to the right side of the building. As you can see I have built up the landscape to the building add have started adding a small storage shed on the side.
Posted Image

Now you can see the shed complete. This was built in the same way as I have said earlier with a wall of normal bricks built behind the 1x1 rounds. The door is built the same way as I showed you earlier, but instead of connecting it with clips, it is attached to some 1x1 bricks with stud, which are holding it up from behind. The roof is attached using 1x2 plate hinges, with half the plate built into the wall, and the other half attached to the roof. This allows us to create a slope with the roof.
Posted Image

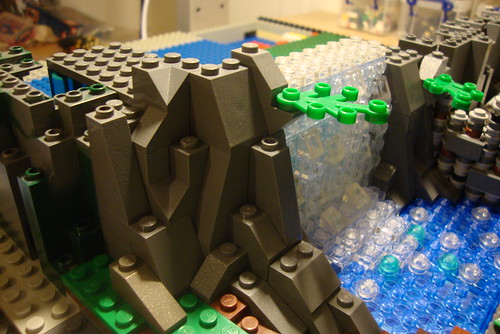
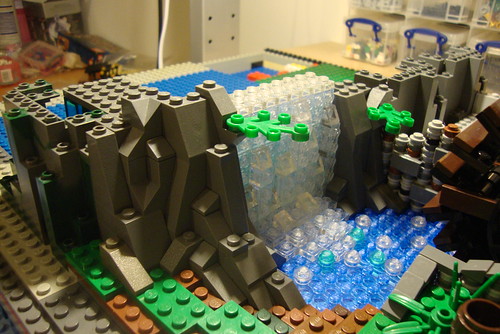
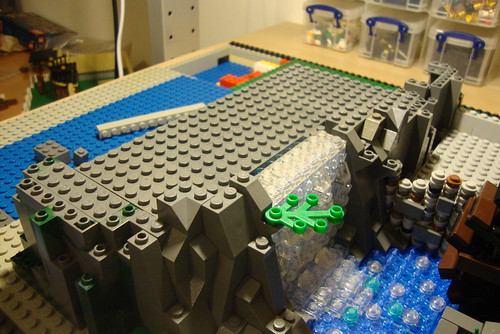
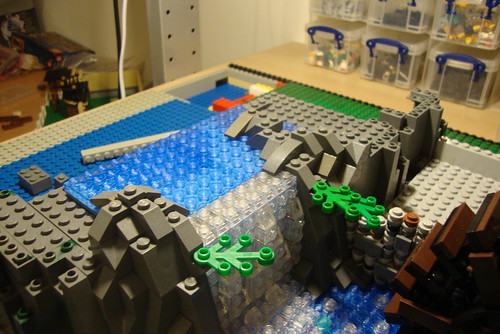
In the next shot, you can see that I have started to build up some more rocks on the side of the building like I did with the waterfall. Again, these are simply done with different slope pieces stacked to get the right effect. Also note that I am building up the black wall of the base to match the landscape so we still get a nice neat effect when we view the moc from any angle.
Posted Image

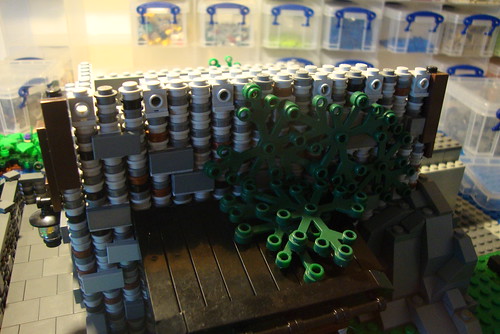
Now you can see I have built up the wall of 1x1 rounds to the needed height and added some headlight bricks spread out across the top. These are used to connect the roof supports. You will also see I have added some foliage. I have used dark green tree pieces here because I plan to build a large tree which means this side of the building will be shaded. Therefore the only plants that would grow would be shade loving plants, so dark green ivy is what we get.
Posted Image

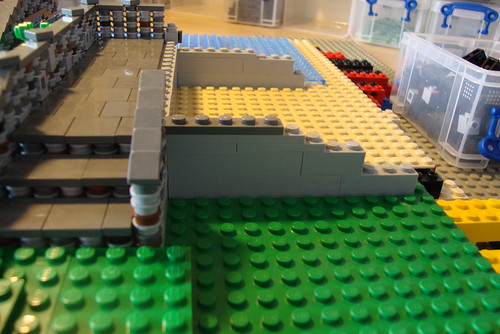
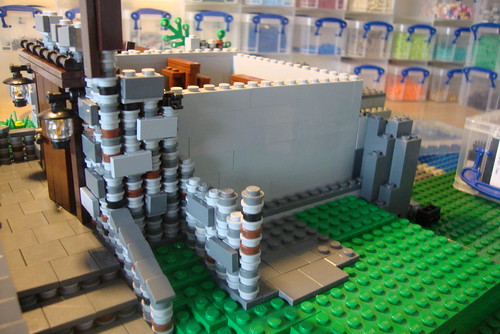
Now we turn our attention to the front. As you can see, I have started to build with some white bricks going up in a diagonal pattern with the 1x1 rounds. I can then attach a tile onto the white brick with the stud, and this will split the two colours and give a nice effect. We then have to do this for each corner of the building at the front and back.
Posted Image

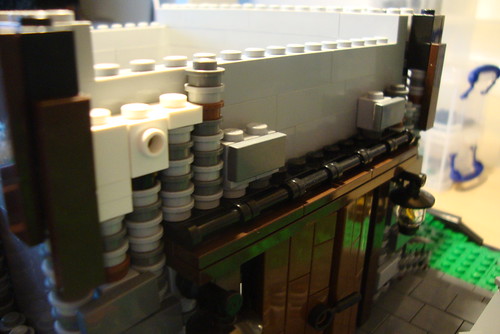
Then we add a whole row of headlight bricks on their backs and attach tiles to the outer studs. This will allow the tiles to sit at the right level above the 1x1 rounds.
Posted Image

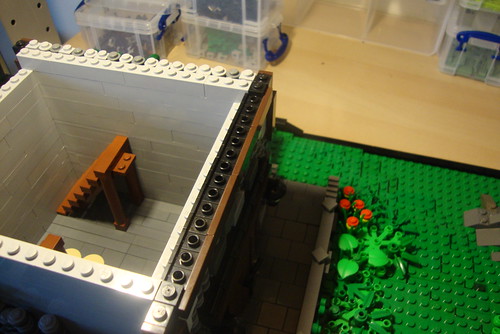
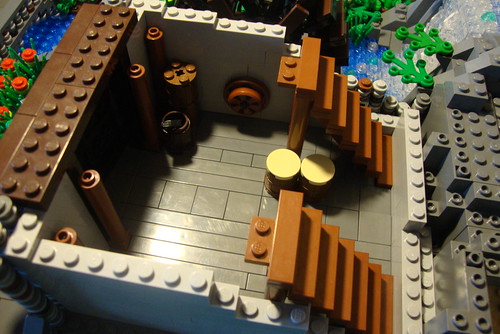
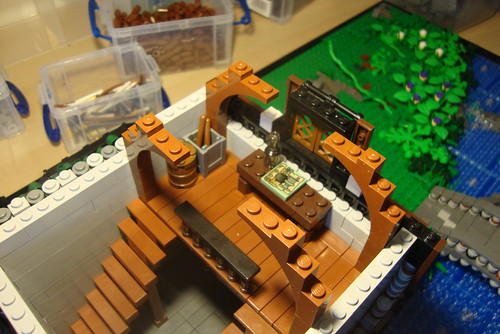
Once that is done at the front and back of the building, its time to finish off the upper part of the interior. Again, I have just done the very basics, consisting of a tiled floor, a table and some barrels. I have also added in some arch pieces which will help support the roof.
Posted Image
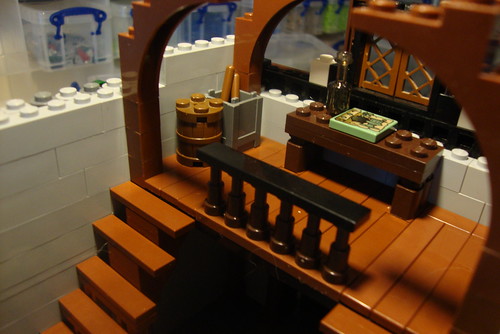
I have also added the windows and fixed the upright tiles in place using the 1x1 brick with stud. All this is explained and covered in the begining of the thread under the basic house building technique.
Posted Image

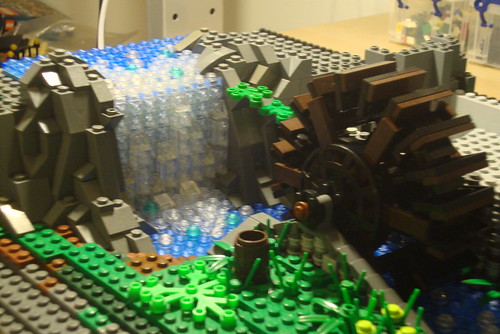
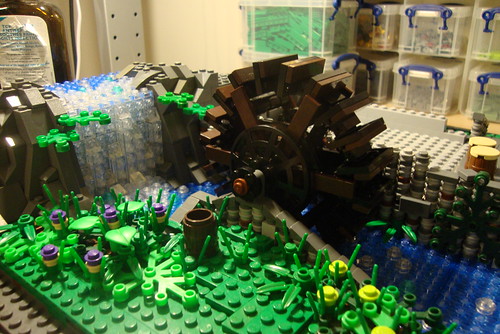
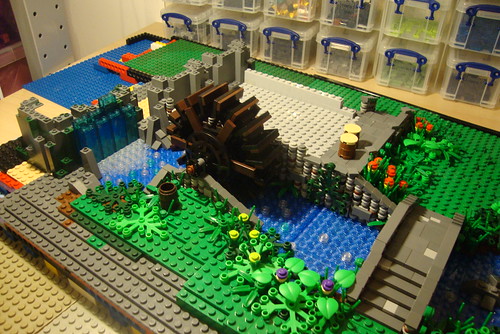
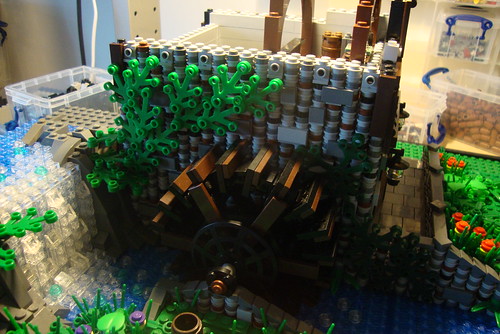
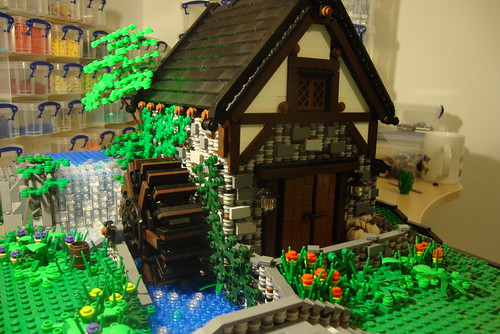
Next we have a picture of the left side of the building with the water wheel. I have built this up the same way as I did on the right side. This time I have used more foliage for climbing plants. The plants that are beneath the water wheel are dark green, as these would be constantly wet from the splashes of the wheel. This means its more likely to be moss, weed, and alge, so dark green is best to use. Then above the water wheel we use a lighter green, as these are growing from the rocks and up onto the building.
Posted Image

Now, in this next picture, you will see that I have added most of the roof and completed the white section with the window. The roof parts are very simple to do and don't need explaining. The only thing to take note is to not overlap the roof bricks over the window side of the building, as we will be attaching the gable ends which you can see taking shape at the top of the roof. Again, the way to make the roof is all covered earlier in the guide.
Posted Image

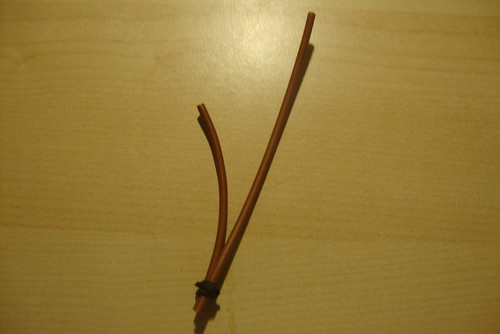
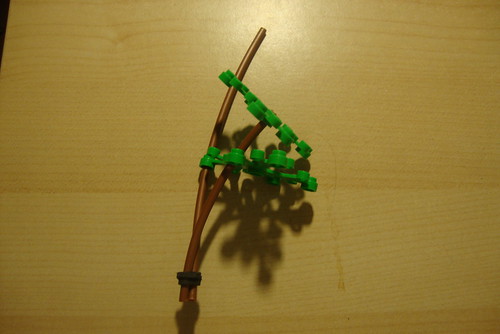
Next, I'm going to show you a very simple and effective way of making small trees. We will be covering larger trees later in the guide, but smaller trees or young trees can be made simply with brown flex tube. All you need to do is get a few pieces of flex tube and use a Lego elastic band to tie them together at the bottom. You can use as many flex pieces as you want, but 2 or 3 work best for small trees.
Posted Image

Then we start added some tree pieces to the flex tube. You should be able to clip some of the tube between the leaves of the tree pieces to strengthen the flex tube pieces more.
Posted Image

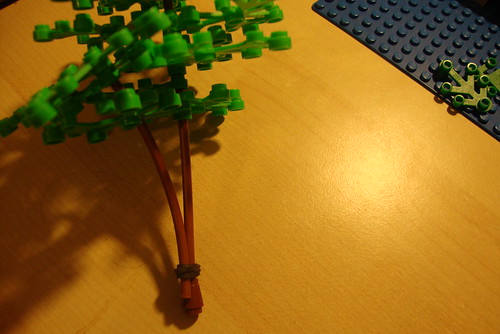
Once you have put on enough tree pieces and your happy with the shape, you can then insert the bottom of the flex tube into a normal brown 1x1 round. This will now allow you to stand the tree anywhere. If the tree is larger and more top heavy, you may need to insert it into a 2x2 brown round for more stability.
Posted Image

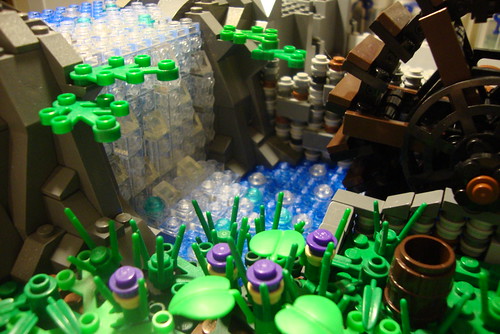
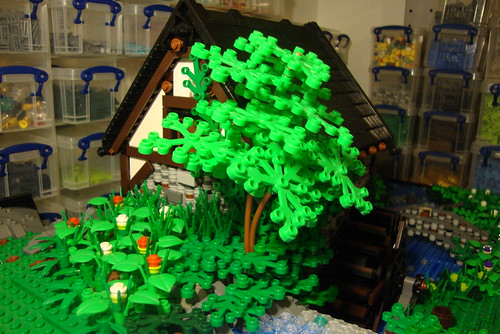
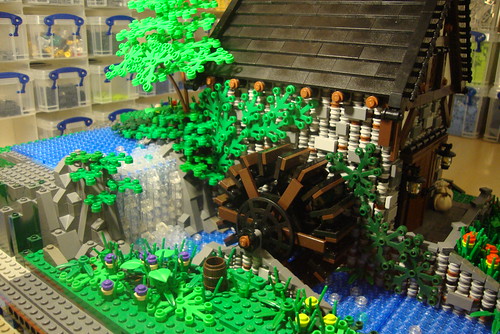
Then all we need to do now, is put the tree in its desired place and then add some plant pieces around the base to hide the elastic band. As you can see in this picture, I have placed the small tree in amongst the creepers overhanging the water fall.
Posted Image

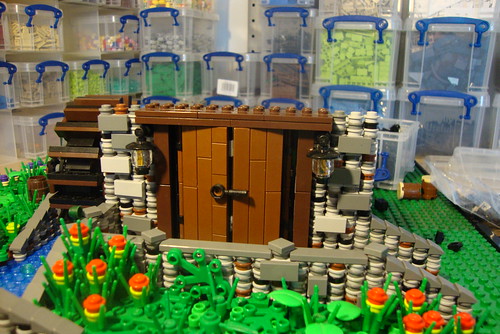
Now we have a view of the front of the finished mill. You can now see the effect of the tiles that were connected diagonally between the 1x1 rounds and the white bricks. It gives a nice look to the building, making it look simple but elegant. I have used dark brown 1x12 plates on the gables to give a nice all round dark brown effect on the top half of the building. I have also added a chimney, which is easily done by leaving a gap when stacking the roof bricks and then filling it in with 1x1 round bricks after.
Posted Image
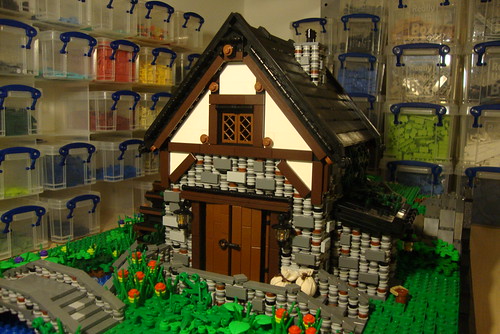
You will also notice the custom sacks I made by the main doors. This were just tea-dyed cotton, wrapped around a mini-fig head and then tied at the top with brown string. Easily done and looks effective.

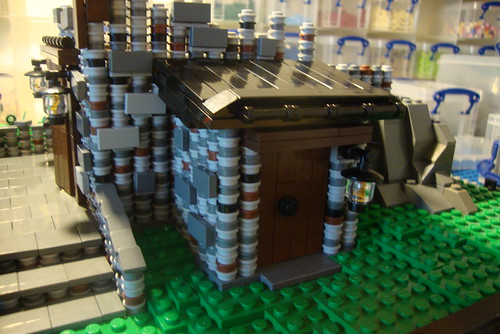
Here is a shot of the right side of the building with a better view of the custom sacks. Note that I havn't placed the roof supports on this side yet, they are just 1x1 normal rounds slotted into the headlight bricks under the roof overhang. You will also notice I have begun building up the hill behind the building, but this will be finished in the next section.
Posted Image

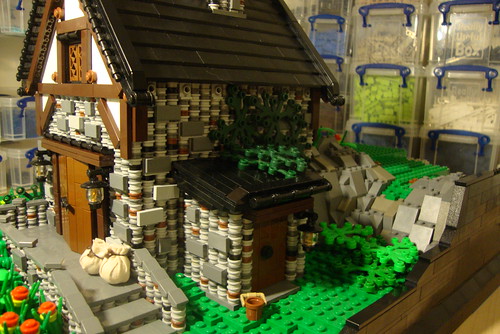
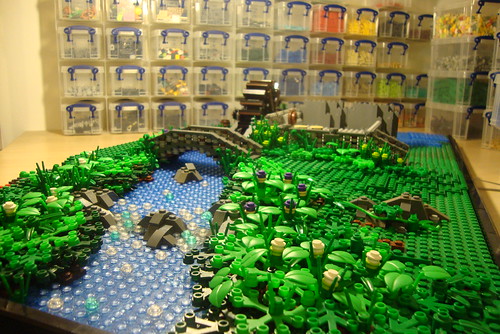
From this shot you can see we are now starting to achieve an overgrown look. The idea is that the mill should look well established, as if it is growing out of the hill. But, we still need to do more work building up the hill to give more of that effect.
Posted Image

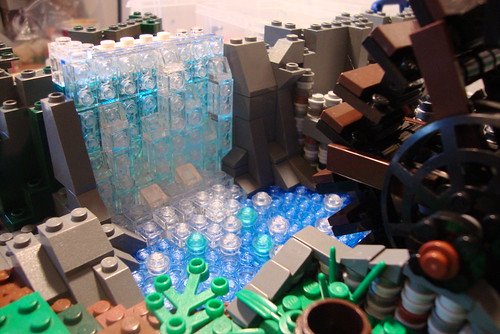
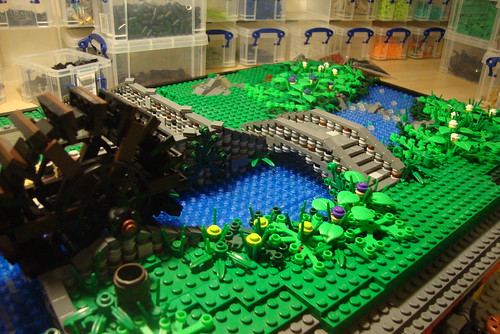
This shot shows a nice view of the creepers growing up from the rocks and onto the building. It is important that the waterfall has lots of plants overhanging it so it gives the appearence that the water is appearing from nowhere. So there is still work to be done here, but its starting to come to life bit by bit now.
Posted Image

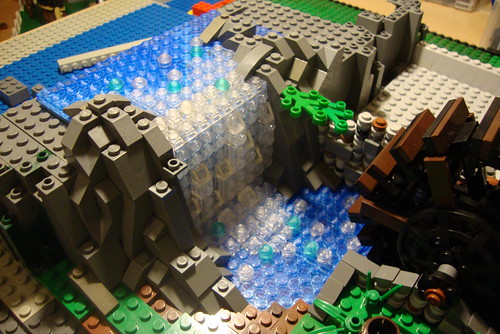
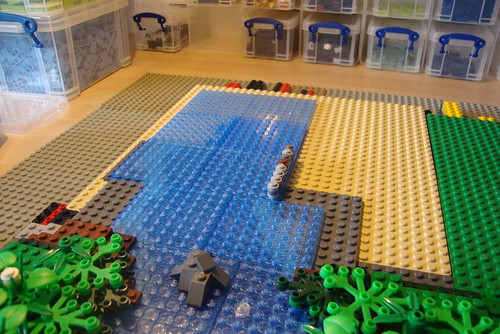
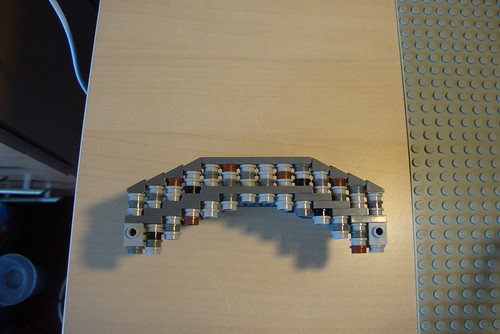
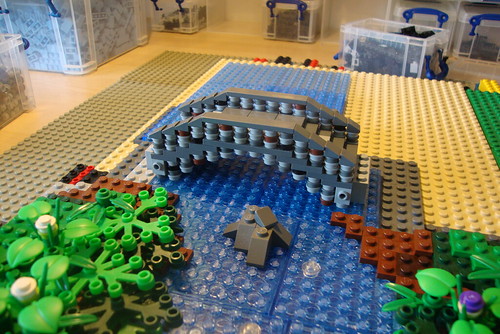
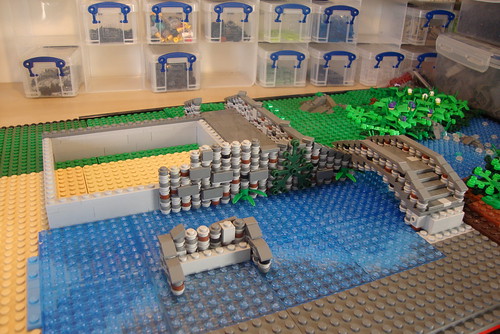
Finally a shot looking down the waterfall to the small bridge.
Posted Image

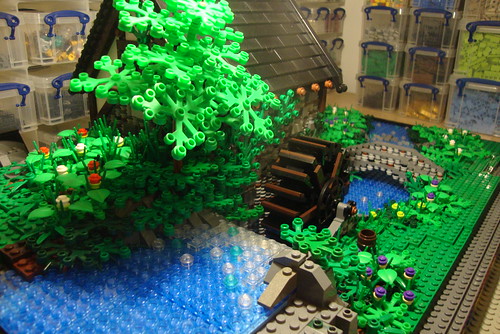
So, the next step will be to complete the rest of the hill and backdrop behind the mill, and try to make it all blend in with plant life. This whole side of the moc will be the more natural overgrown side, as the other side will consist of the main village and will therefore be full of buildings and muddy trackways.

A lot of people will look at this guide and think 'I havn't got enough bricks to build something like this'. Well that's not the point, as you can build some very detailed smaller mocs on a 48x48 base plate using this guide. If you look at a lot of my recent mocs, particularly my CCC entries, you will see they were all smaller builds constructed on a 48x48 base plate. Yet they weren't any less detailed then this one. So don't be put off just because this is going to be a large build. Im only making it large so I can cover lots more parts on different buildings and landscapes. To be honest, I stopped building large mocs a while ago, as at the moment I have much more prefered building smaller, its quicker, you can get more mocs built and it doesn't take an age to take them all apart. Having said that, I forgot how much I enjoyed building on a large scale, and I'm now going to really push this moc to see just how detailed and natural it can be. Its early days and there's still quite a bit to be done. But I said I'd make a Medieval Village and that's exactly what I'm gonna do :wink:

As usual, the next post will be up asap.

Thanks for reading
DC

Thursday, October 13, 2011

Chapter Four: Waterfalls

 EDITORS NOTE:  I am not Derfel Cardarn.  I am a member of the Derfel Cardarn Appreciation Society.  The following was article is from a Lego online discussion forum www.eurobricks.com. All photos and content belong to the great "Derel Cardarn"

The following was posted by "Derfel Cardarn" on Eurobricks.com discussion forum. 

Now its time to do the waterfall.

Waterfalls can be tricky as its easy to get the wrong look, but a good waterfall no mater how big or small can make a great addition to a landscape. Luckily a simple solution can be reached using mostly 1x2 and 1x1 clear plates.

Firstly I use an 8x8 trans medium blue plate as used for the river, and cover it with a layer of 1x2 clear plates. Then I start another layer from the bottom going up in different lengths topped off with a clear 1x1 wedge piece.
Posted Image

Posted Image

Once that is done, we need to fit it in place. There are 2 methods of doing this depending on what bricks you have. I have mocked up a close up of the two different ways below.
Posted Image
In this first picture you can see I have conected the waterfall piece using a 1x1 with stud. Notice there is a gap between the vertical waterfall and the horizontal clear plates at the bottom. If you are lucky enough to have Clear 1x2 tiles, you can use them here to fill that gap and so connect the waterfall in this method.

If like me, you have never thought of buying 1x2 clear tiles, then we have to do it another way.
Posted Image
In this picture I have the same set up, but have used a 1x1 headlight piece instead of the 1x1 brick with stud. Because the headlight brick has a indent of half a plate, if we connect a 1x1 plate onto the indent we then get an overhang of half a plate. This means that the vertical waterfall piece will now sit up against the clear plates on the ground. You will still have a few little gaps inbetween the studs, but it doesn't notice. You will also have half a plates width gap between the waterfall piece and the wall behind, but again, it wont be scene.

Now we can put it in place.
I have used clear headlight pieces to connect it, rather then the black ones in the picture above. I have also placed 1x2x5 trans blue bricks behind the waterfall to give it a deeper colour.
Posted Image

Now we can build up some of the rocks on either side of the waterfall. To do this, all we do is use different sized dark grey slope pieces and stack them randomly till you get an effect you are happy with. Its really a case of trying different slopes in different places till you achieve a gradual slope and you are happy with it.
Posted Image

Its also handy to have some dark grey wedge pieces, as you can add those on to where ever you feel needs it to help with the effect.
Posted Image

Then we need to level off a small area at the top so we can build a small section of stream.
Posted Image

We then lay a small section of stream, using the same method as before, and then add some more dark grey slopes to finish the top of the rock work around the waterfall.
Posted Image

To finish it off, we then add some more 1x2 clear plates and use these to connect the waterfall to the stream. A few clear and trans light blue 1x1 flat rounds have also been added to help give the effect of bubbles and foam.
Posted Image

The waterfall should now look something like this.
Posted Image

We can then add some foliage around the bottom to complete the look. The top however, has much more work to be done on it yet, but that will come later.
Posted Image

Posted Image

When it comes to building larger mocs like this, I prefer to not have a plan. Yes, I do start out with a vague image in my head, but I prefer to just build and see how it developes. Having reached this point, I can now see tha
t we will have a hill all across the back of the moc, with a cottage above the mill on the right and a windmill at the top of the hill on the left. Then at the bottom of the hill to the left of the mill we will have the main village with its houses and traders. Maybe a pond as well.

Once the hill is all built up behind the mill we can look at placing some trees, then finish of the whole right side of this moc before moving on to the left.

But first, we can now get that Mill finished!

Next post coming soon!

Thanks for reading.
DC

Tuesday, October 11, 2011

Chapter Three: A Bridge and Waterwheel

EDITORS NOTE:  I am not Derfel Cardarn.  I am a member of the Derfel Cardarn Appreciation Society.  The following was article is from a Lego online discussion forum www.eurobricks.com. All photos and content belong to the great "Derel Cardarn"

The following was posted by "Derfel Cardarn" on Eurobricks.com discussion forum.  

Ok then, time to continue on. The next part consists of three main features: A bridge, a Water Mill and a Waterfall. Each part is tied into the other as you will see.

Firstly, we continue on from where we left, building more of the stream. Note that I have now made a flat edge with the water on the right side, and laid a few 1x1 rounds as a marker of where the wall of the Water Mill will go.
Posted Image

Before I start the Mill, we need to make a small bridge. Now when it comes to making large bridges, 1x1's are good, as there's a lot of room for different techniques on a large bridge. Unfortunatly, trying to make a small bridge out of 1x1 flat rounds is not easy, as you can't float them in mid air to make a curved shape. So, some normal plates are going to be of use here as well.

First we make the shape of the bridge using normal 6 wide dark grey plates.
Posted Image

Then we build a 3 plate high wall of 1x1 round plates, then add some dark grey tiles and wedges to top it off.
Posted Image

Then we use the 1X1 rounds underneath the grey plates and stack them to make a curved shape like in the next picture.
Posted Image
Note I have also added 2 1x1 bricks with stud at either end of bridge. This is to attach some foliage.

Then we repeat all that on the otherside, then we can add some tiles on the bridge and it should look something like this.
Posted Image

Now we place the bridge in position.
Posted Image

Then we can start building up the landscape to the bridge, using the same techniques as before. After which, we can add a bit of foliage.
Posted Image

Posted Image

Now, we will leave the bridge for a moment and concentrate on the foundations of the mill. In this picture you will see I have started laying down a few grey bricks as a marker of where the mill will be.
Posted Image
I have also started to build the side wall of the mill which connects to the bridge.

Next I have started to build up the front of the mill and added some plates which will make the porch of the Mill.
Posted Image

Then we start building the stairs down step by step.
Posted Image

Posted Image

Once the steps are done, we can build the rest of the porch wall and then build up the landscape with green plates till we get something that looks like this.
Posted Image
Note that I have raised some 1x1 tiles above the rest and twisted them at an angle. This gives quite a nice effect and tops the porch wall of nicely.

In this view, you can see a dark grey plate that marks where we will start the wall of 1x1 round plates. This means that we will need to build up the landscape to that level, but that will come latter.
Posted Image

Now, we can see from another angle that I have now marked out the full foundation of the mill, and I have also carried on with the outer wall by the steam. On the other side of the stream I have built a small section of wall. Between these sections of wall is where our water wheel will sit.
Posted Image

So now we need to find out at what height the water wheel will sit on the wall, and to do that, we need a water wheel!
There are 3 main types of water mill designs. Under shot, Over shot and Breast shot. Under shot is where the water wheel sits partly submerged in the stream and is powered by the stream's flow. Over shot is where the water is channeled to drop on top of the water wheel, and Breast shot is where the water drops in half way on the wheel. The most common you will see in pictures is the Over shot design, under shot was more common in medieval times however, so this is the method we will use.
Every time I build a Mill, I try a different design of water wheel. I wanted one that looks like it has large paddles which is what were needed for the job. I figured hinge pieces were the best way to go, and after trying out all the different hinge pieces I found the 1x2 brick hinge to be best. Here is a picture of all the parts of the water wheel.
Posted Image
You can see I have used a 2x4 plate with a dark brown tile and a 1x2 brick hinge for the paddle design, then kept stacking them on top of each other to make a chain that can then bend to a circle. The water mill parts from MMV set are used to make the structure and I have used black 1x1 rounds with a pole piece through the middle to make a double headed pieces to attach the two wheel frames together. The following pictures show how it is put together.
Posted Image

Posted Image

As you can see, I have not wrapped the paddles all the way round the whole wheel. This is so it gives the appearence that the bottom is submerged in water.
Posted Image

Now we can attach the wheel in place by threading the technic axel through a 1x2 brick with a hole or any other way that suits you. When it comes to putting the hinged paddle design round the water wheel frame, its simply a case of bending and messing with all the hinges till you get a round shape, it is pretty stable and will stay in position.
Posted Image

Then, as before, we can build up the landscape and add some foliage. The small bridge is now fully landscaped into place.
Posted Image

Now we can turn our attention back to the rest of the Mill. As you can see, I have now replaced the back wall of the mill with some rock pieces(BURPS). This is because the mill will be built into a hill, as we want to get the effect that the old mill is part of the landscape.
Posted Image
This also means we will have a nice hill as a back drop to the village, but more on that later.

Next we can lay some plates down inside the mill for the floor.
Posted Image
I have also started to build up the Mill wall's.

Because the Mill is built out from the hill, this allows us to have a waterfall where the stream flows off the top of the hill. As you can see, I have marked out where the waterfall will drop with trans clear plates. I have also added some rock pieces and slopes to mark where the rocks will join to the mill and the land. This is just the template, as the water fall needs to be properly built up.
Posted Image

So for now, we have this.
Posted Image

Next up we will see a big difference. The next part involves finishing the mill and waterfall, then building up the hill. Thats when things will really start taking shape.

I have nearly finished that section, so won't be long till the next post.

Thanks for reading
DC